Map Gaze Throughout an Entire Room
TIP
Level-up your Reference Image Mapper workflow to extract insights from participants freely exploring their environment!
Exploring Gaze Patterns in Multiple Regions of an Environment
Understanding where people focus their gaze while exploring their environment is a topic of interest for researchers in diverse fields, ranging from Art and Architecture to Zoology. The Reference Image Mapper enrichment in Pupil Cloud makes it possible to map gaze onto 3D real-world environments and generate heatmaps. These provide an informative overview of visual exploration patterns and also pave the way for further analysis, such as region of interest analysis.
In this guide, we will demonstrate how to use the Reference Image Mapper to map a participant's gaze onto various regions of a living environment as they freely navigate through it.
TIP
Before continuing, ensure you are familiar with the Reference Image Mapper enrichment. Check out this explainer video for reference.
The Tools at Hand
The Reference Image Mapper enables mapping of gaze onto a single reference image of an environment. However, there is often a need to analyze multiple regions for a more in-depth understanding of visual exploration. This guide demonstrates how to accomplish this by applying the enrichment multiple times during the same recording to generate mappings and heatmaps for different regions.
Steps
For the analysis, we will need the following:
- Multiple reference images of the environment
- Single or multiple scanning recordings. The choice of whether to use single or multiple scanning recordings depends on the dimensions of the space to be explored (see below for examples)
- An eye tracking recording taken as the participant(s) move freely within the environment
- User-inputted events to segment the recording(s) into sections based on the areas the person was looking at
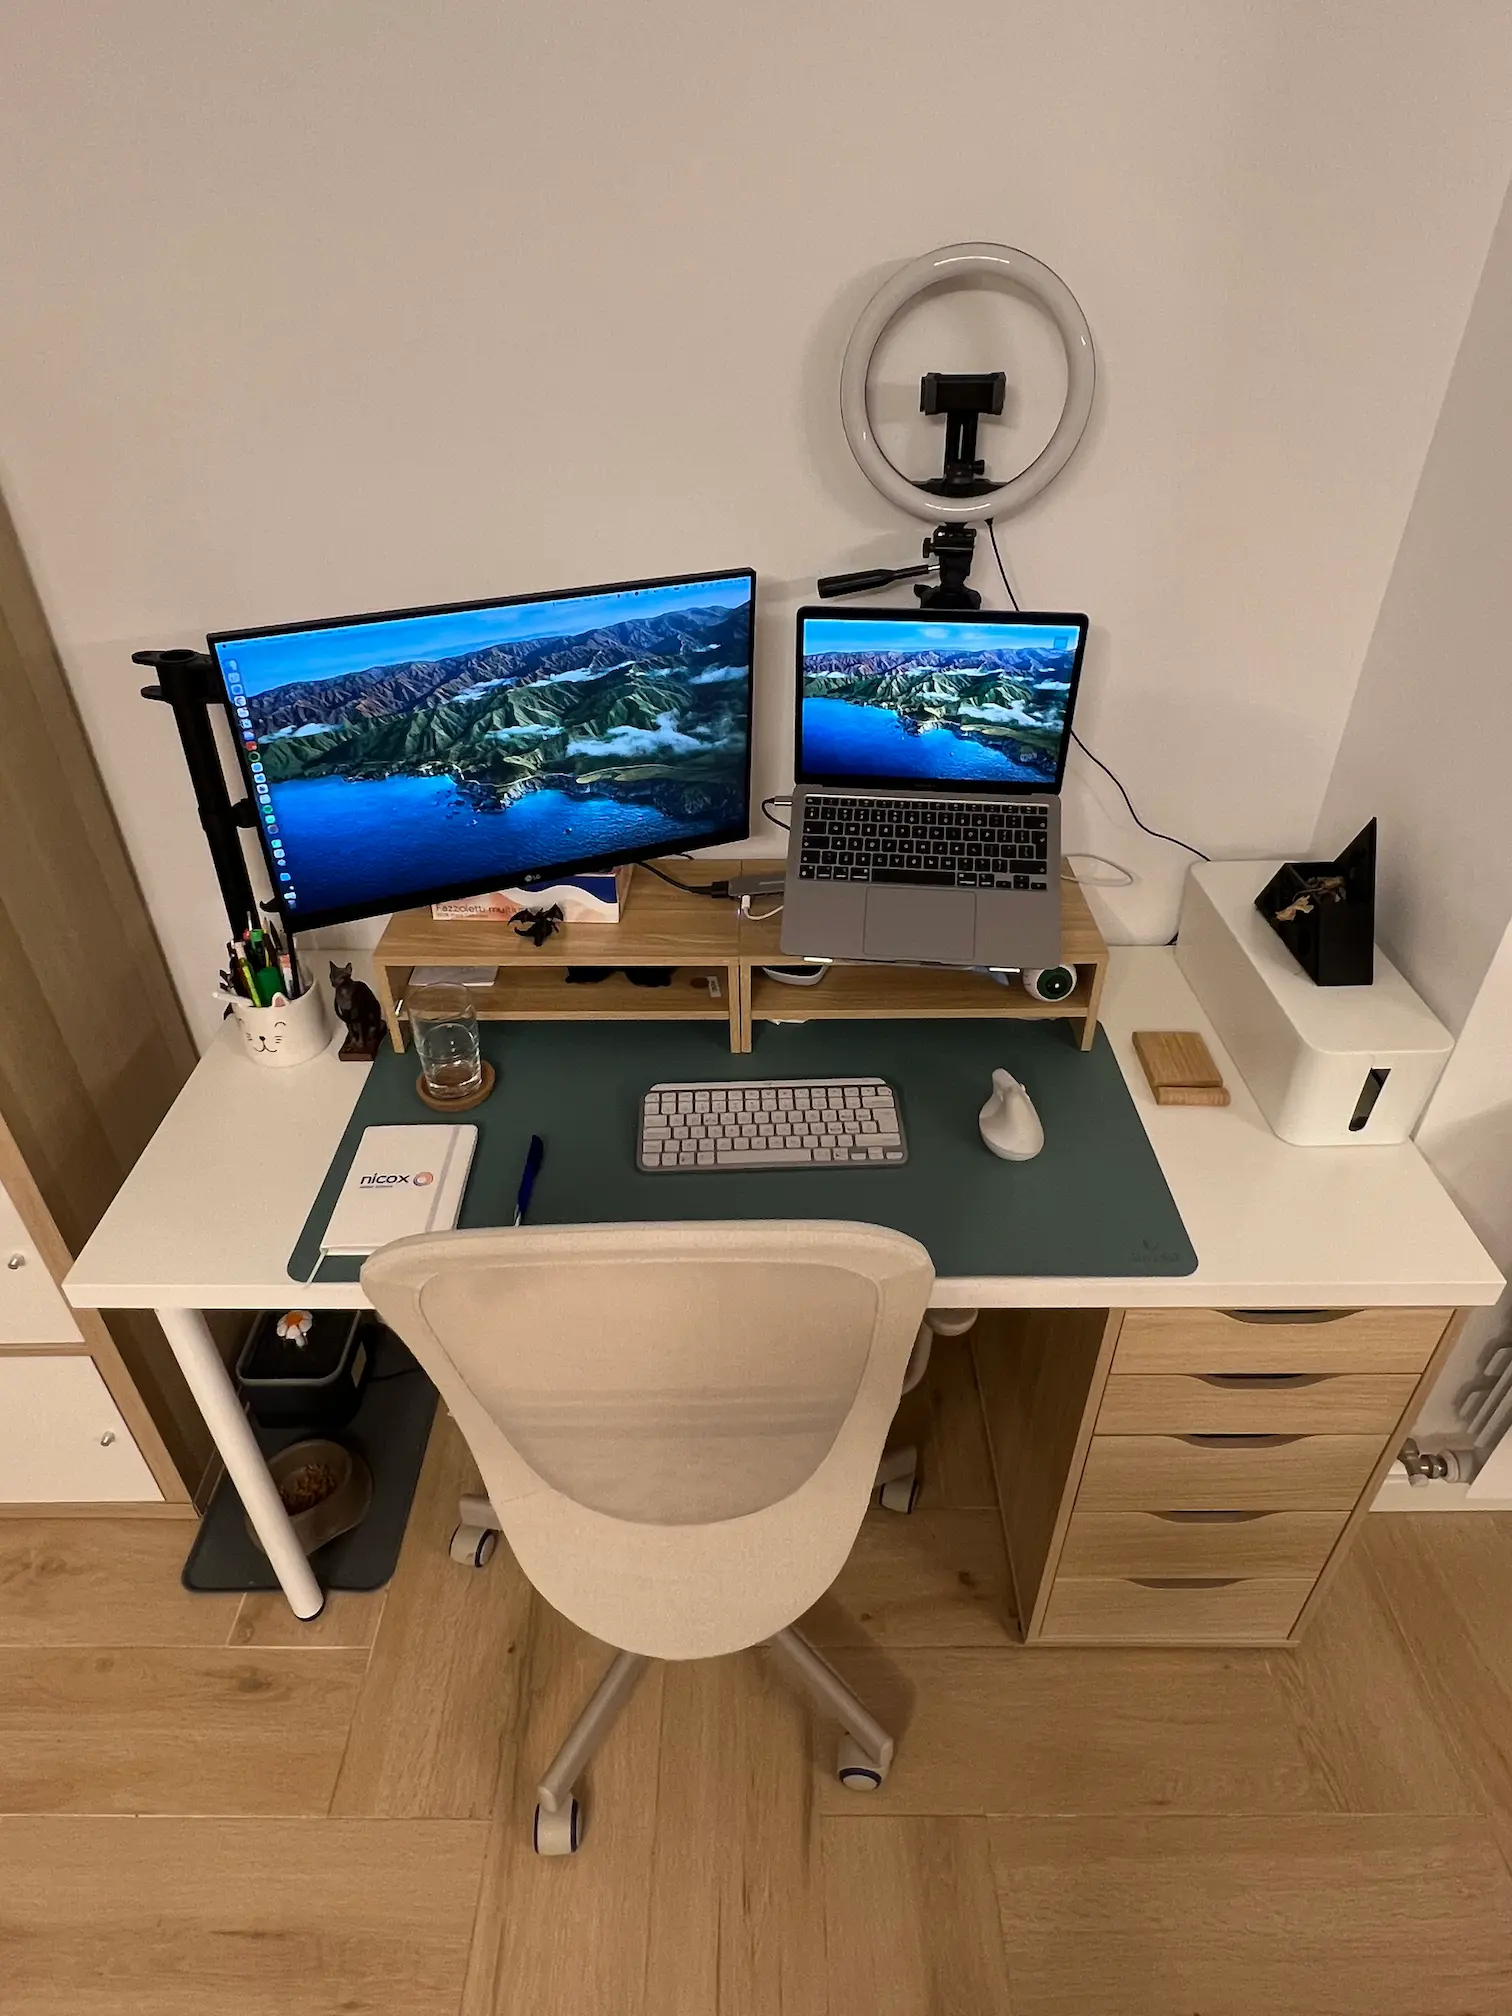
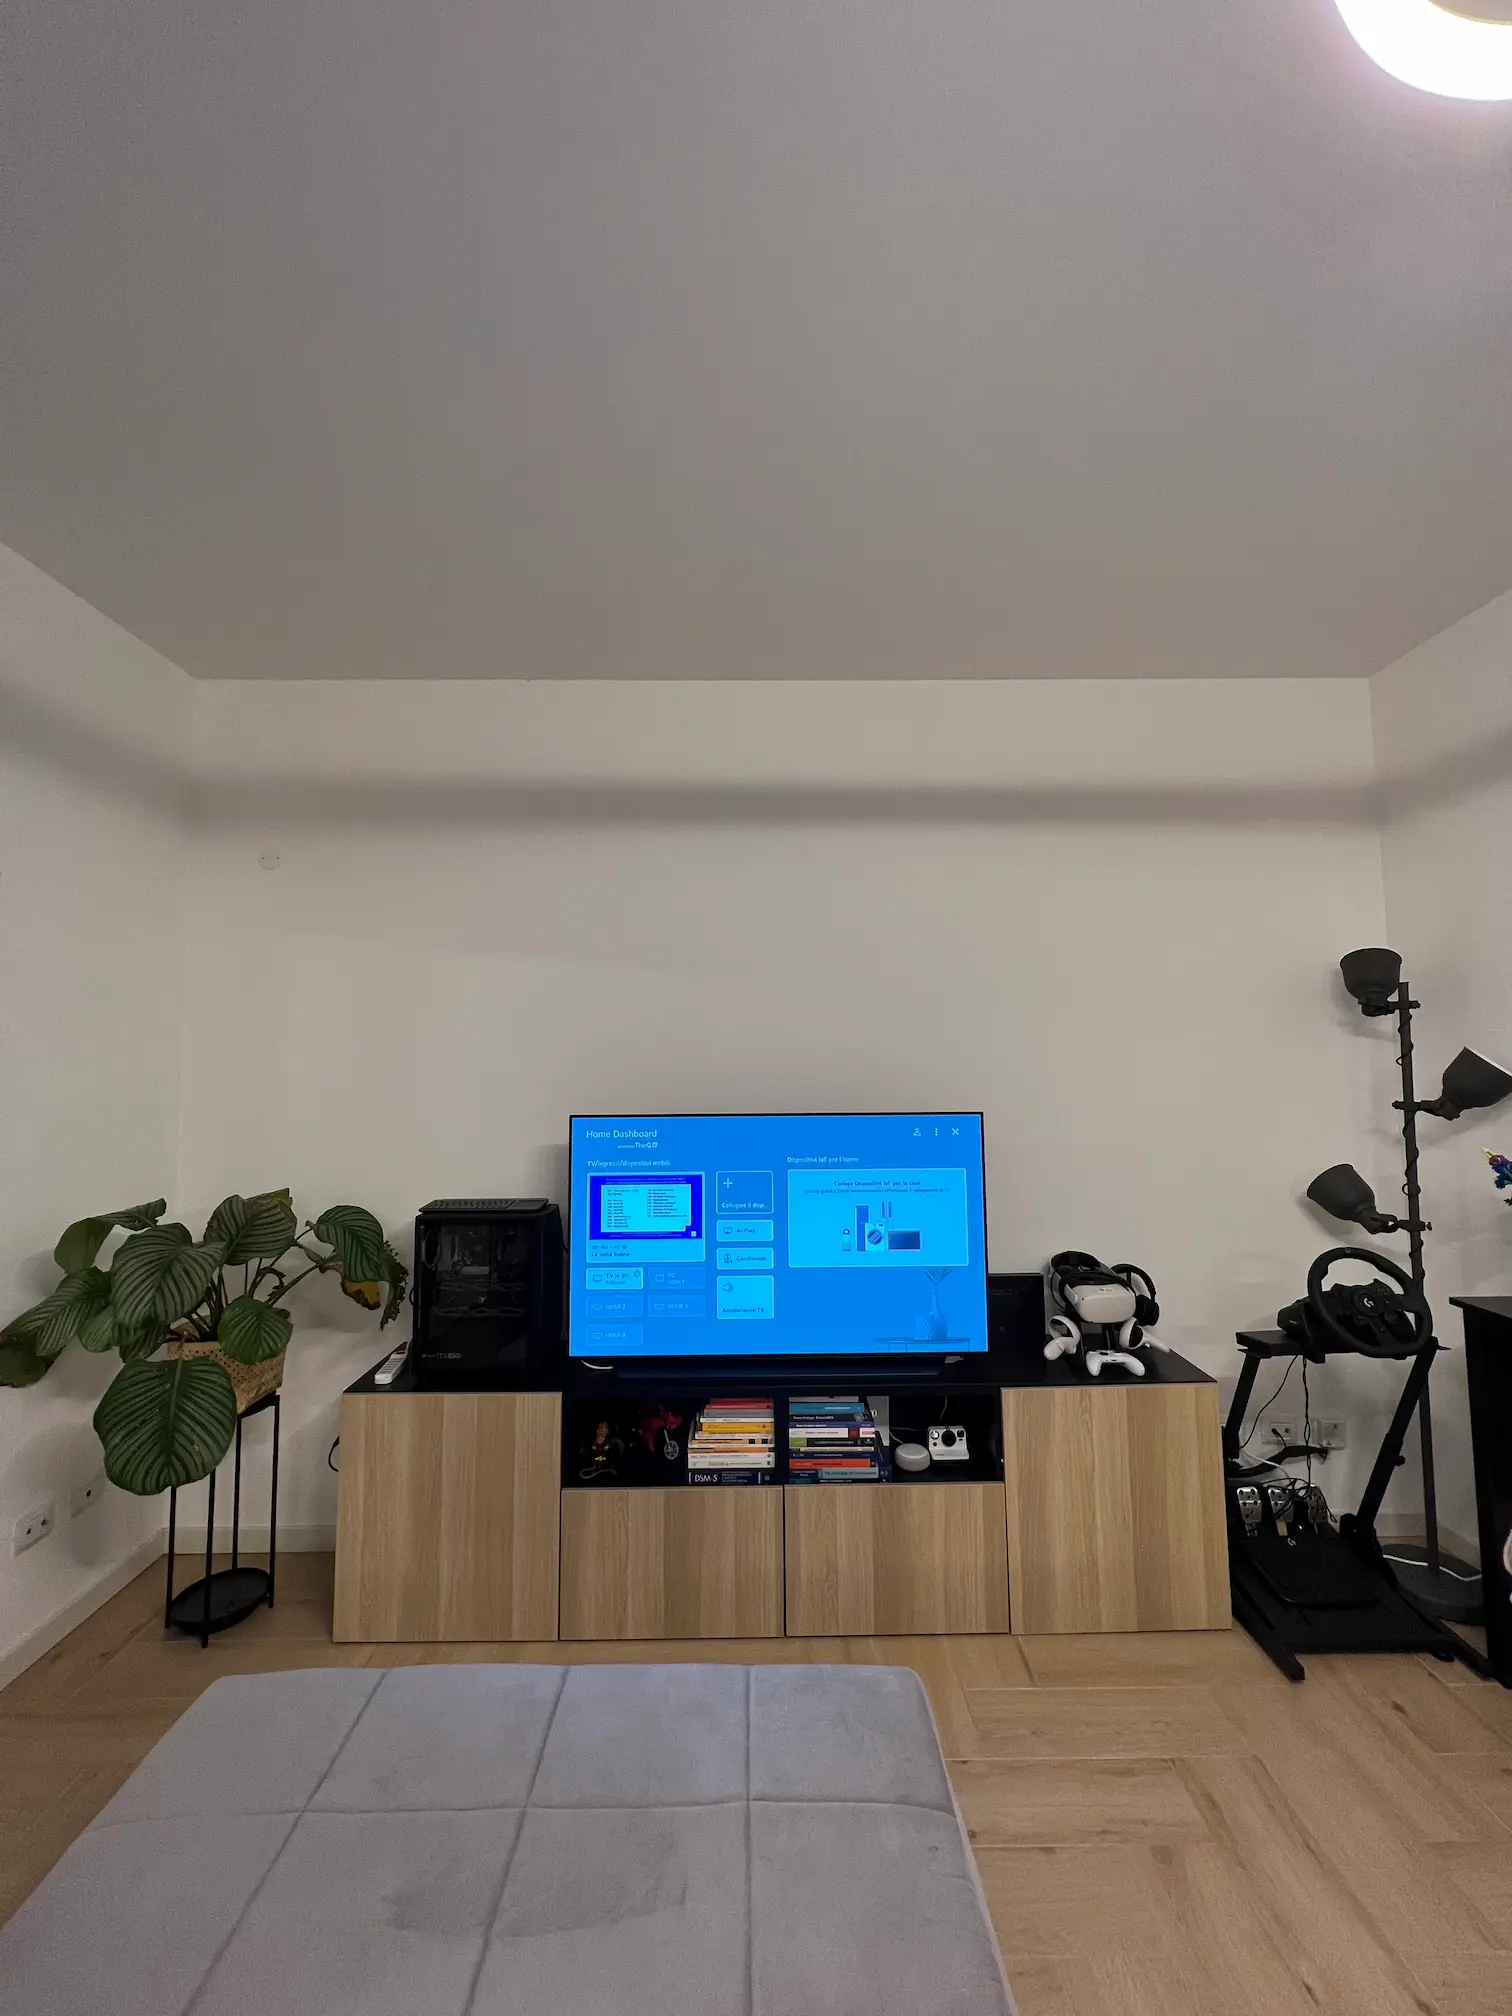
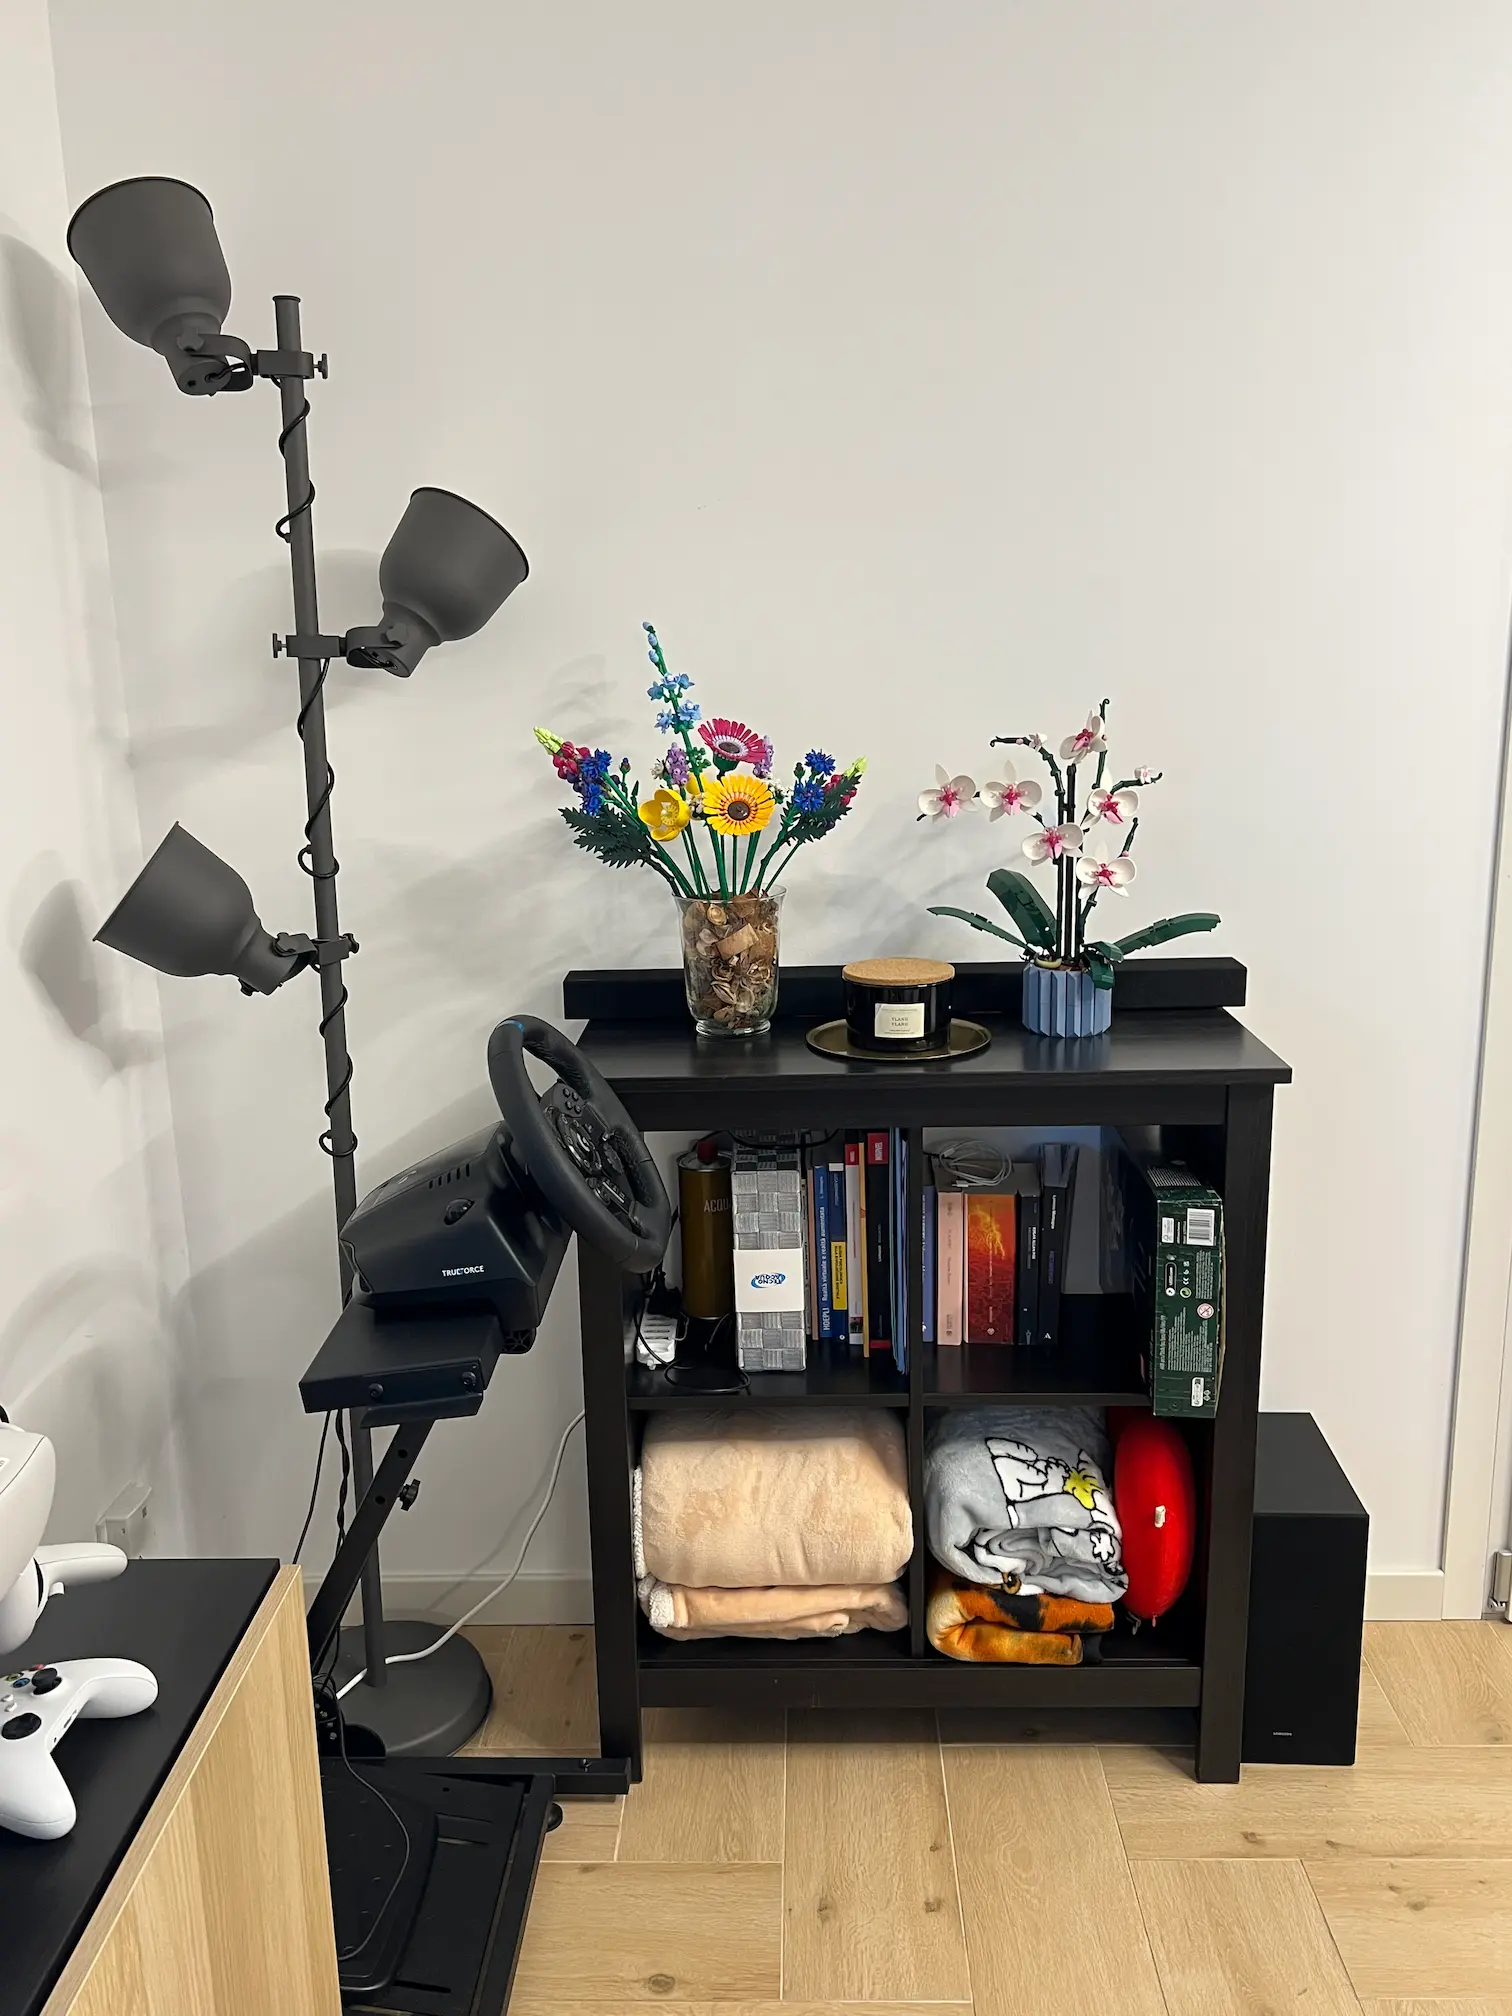
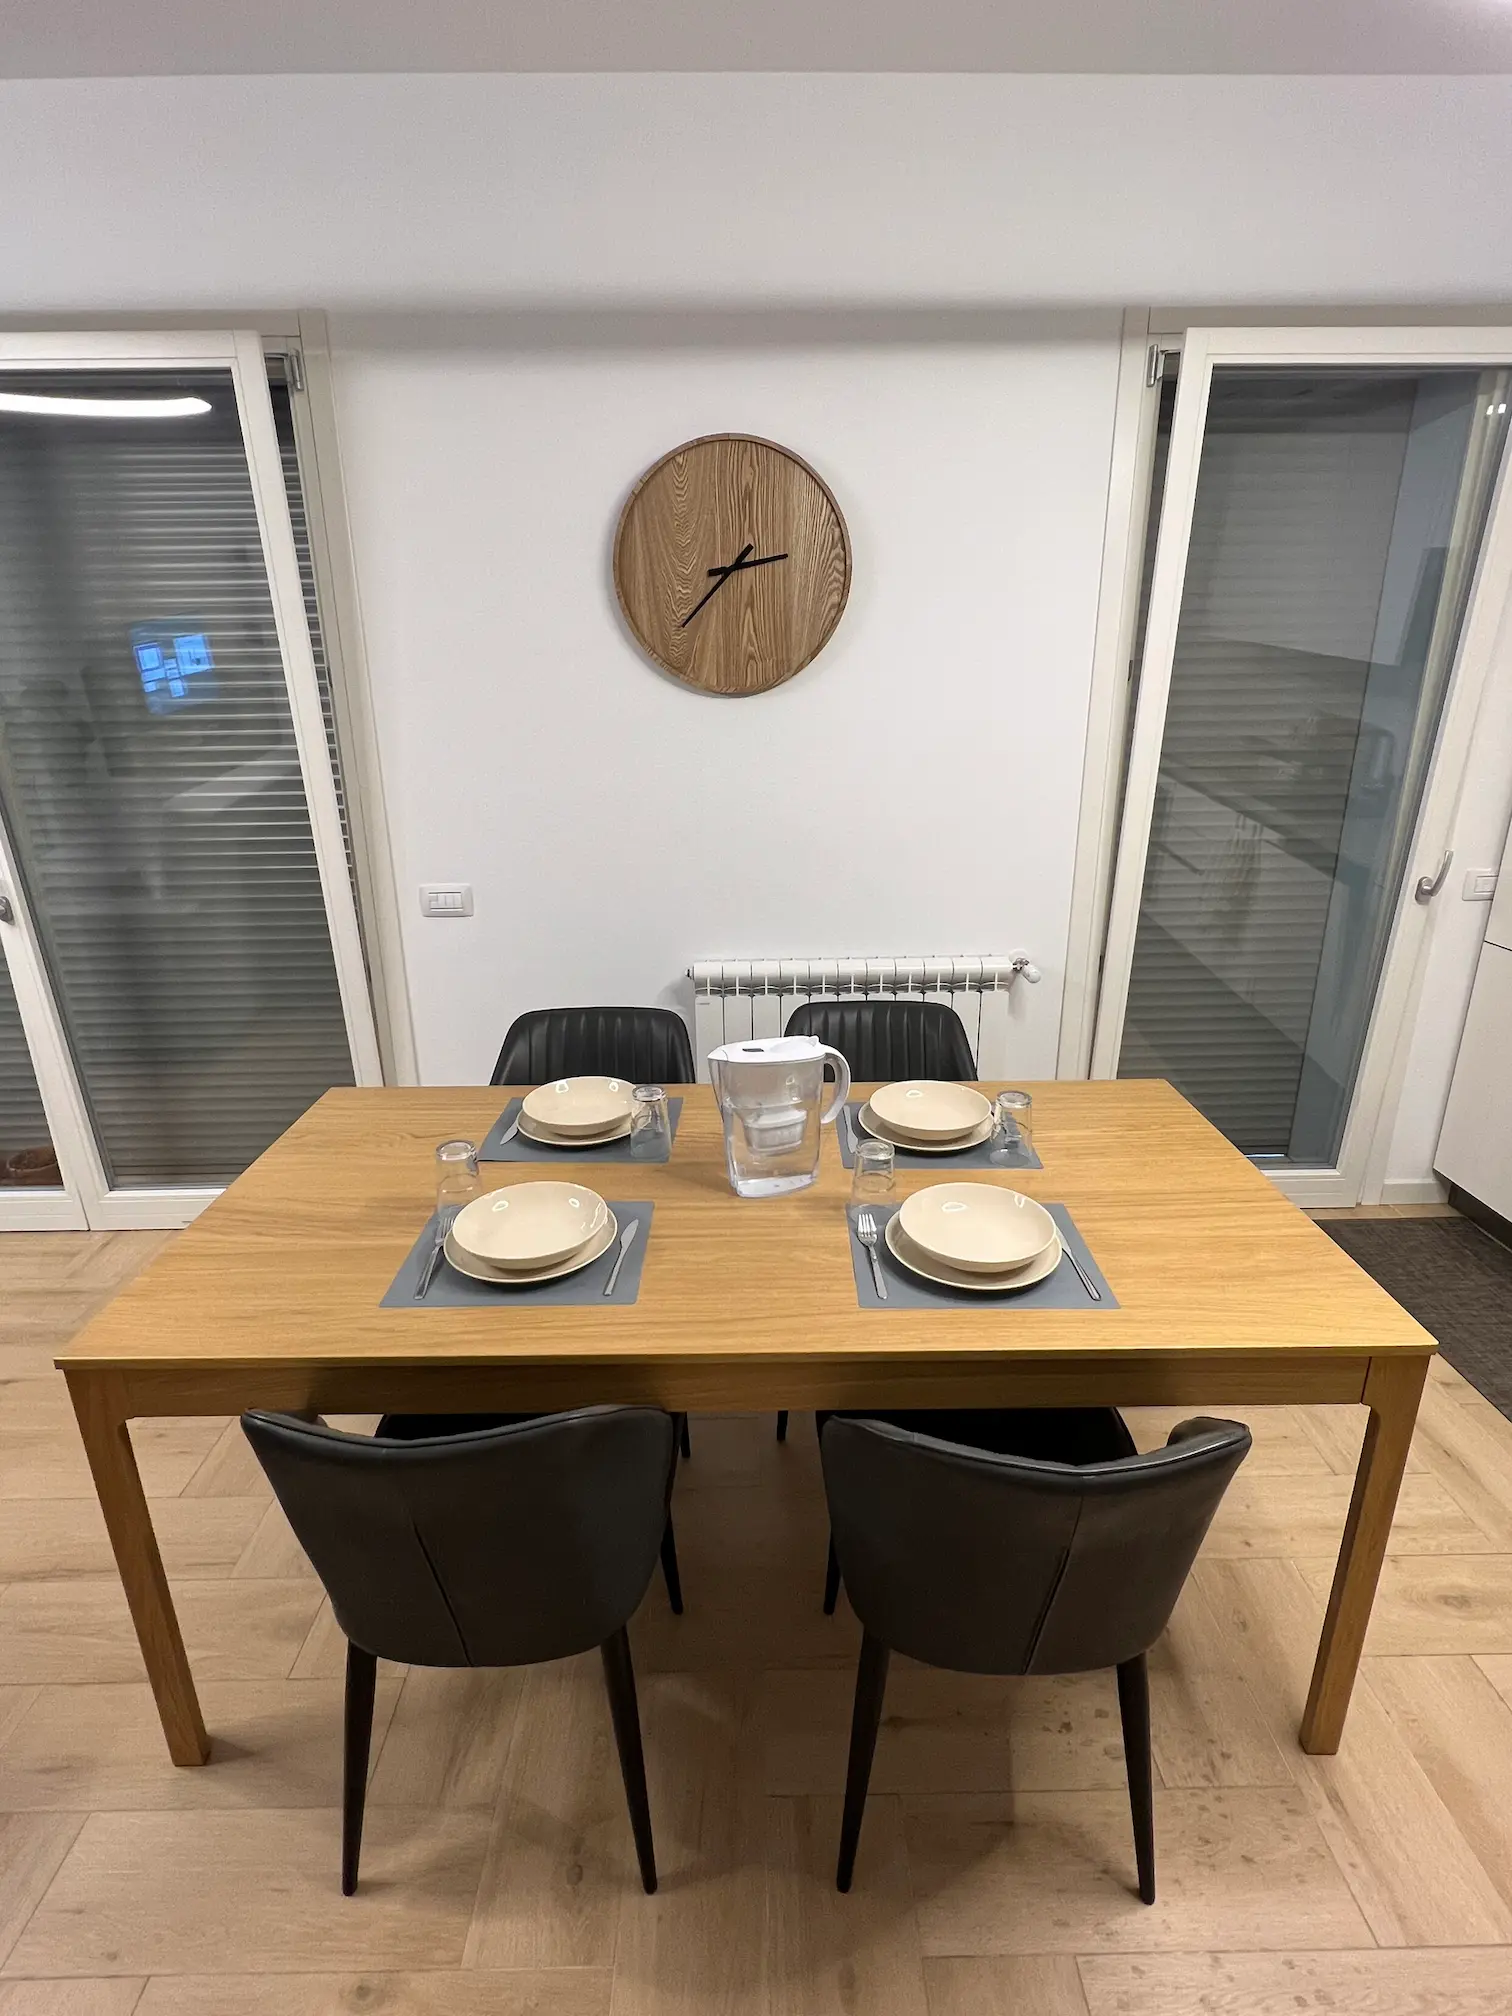
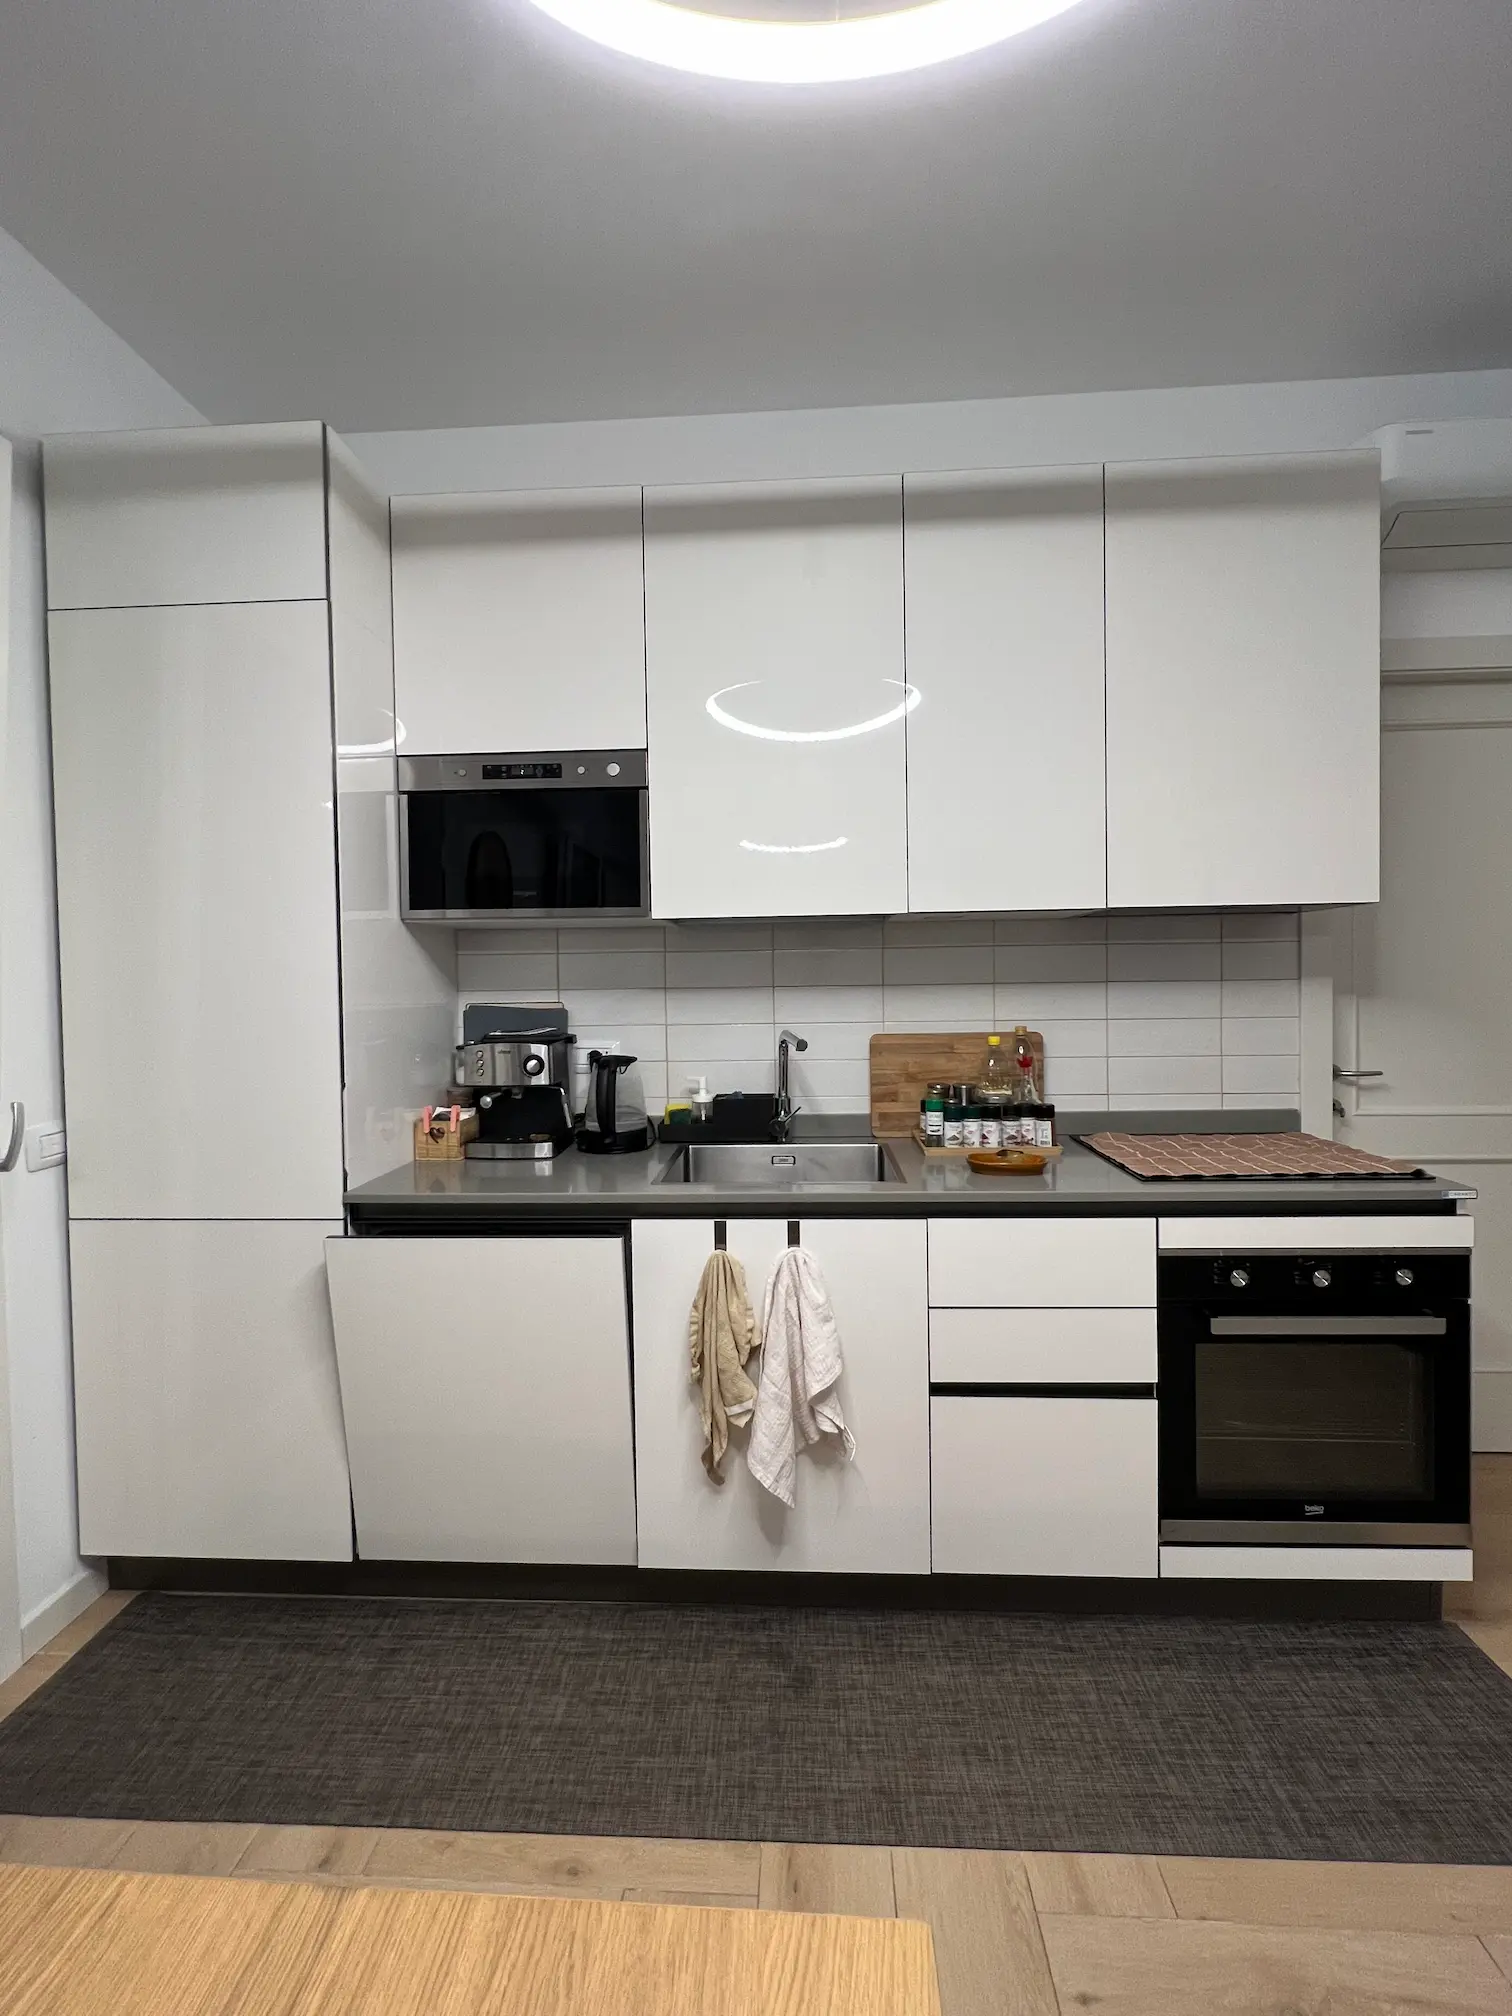
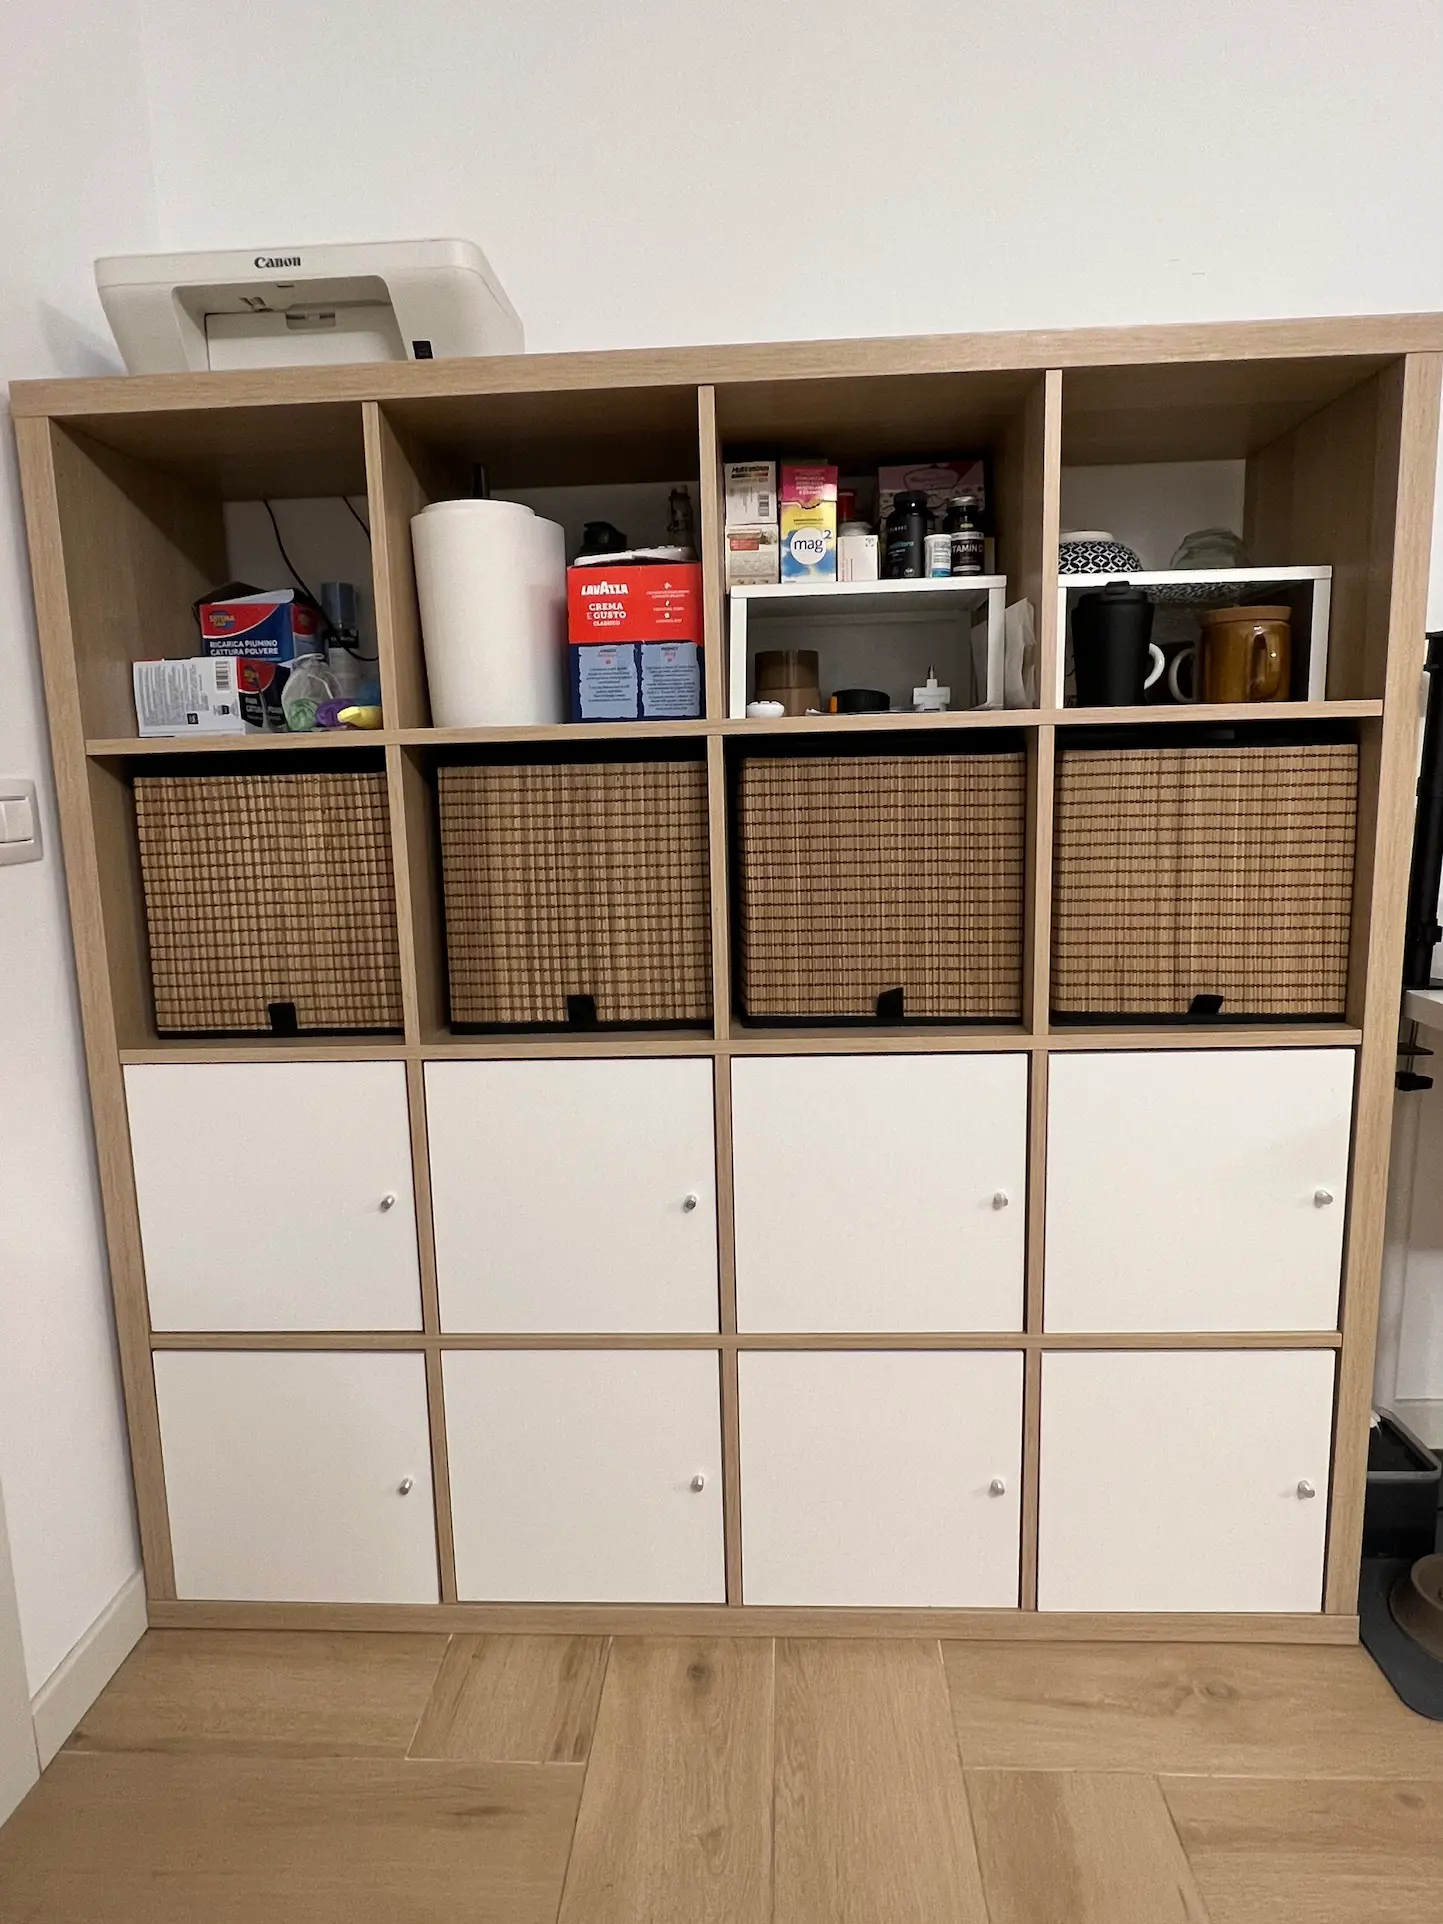
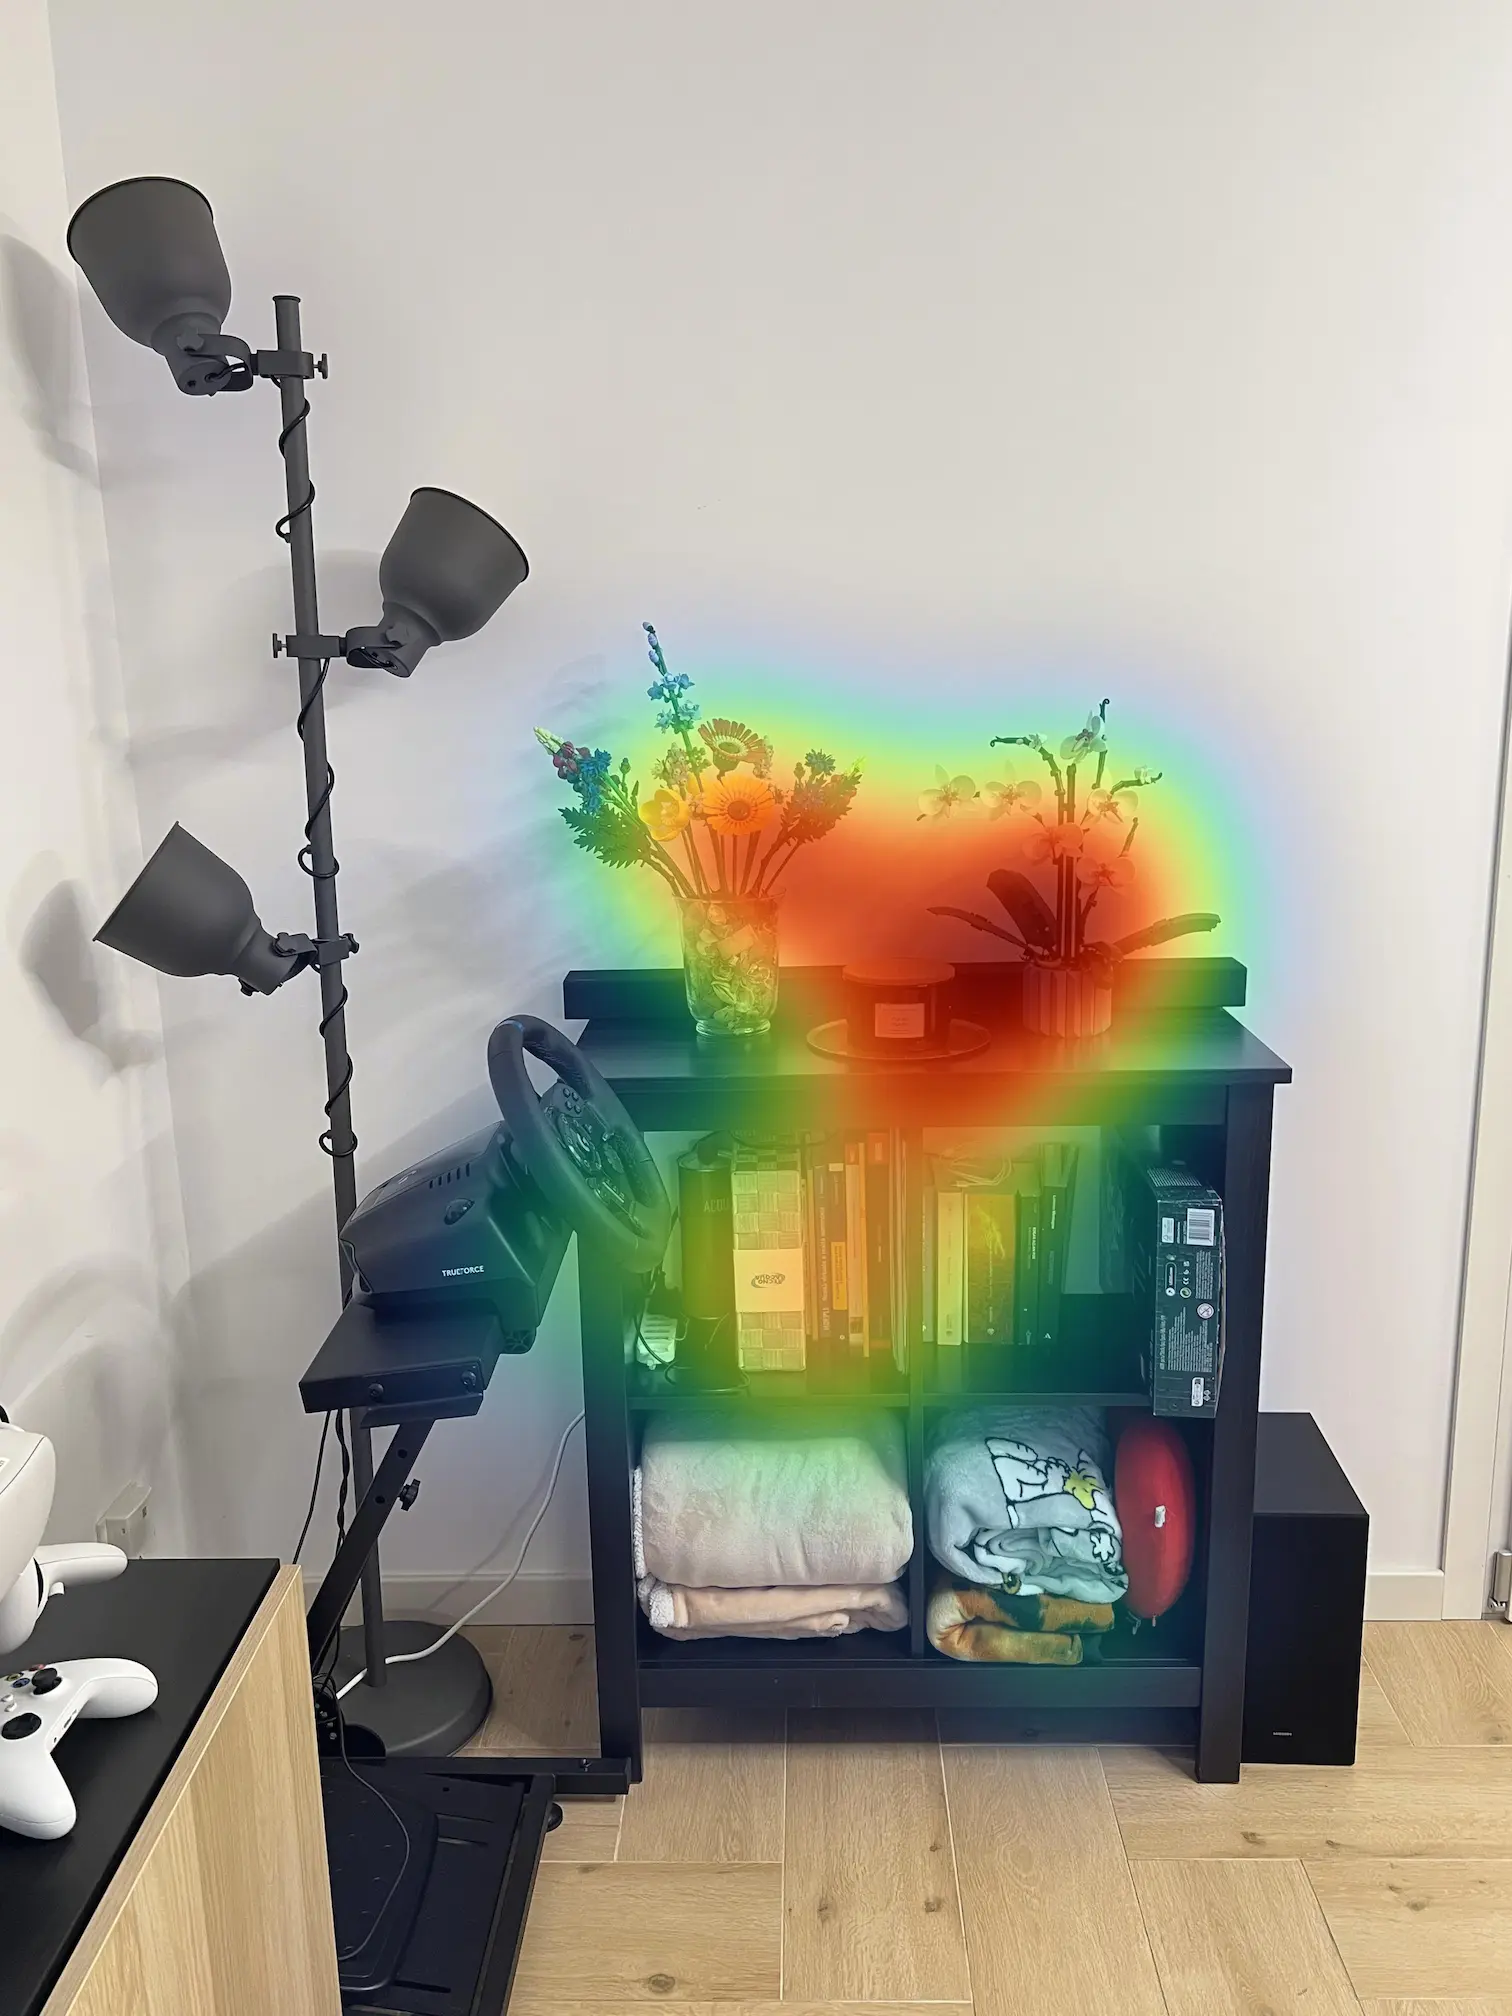
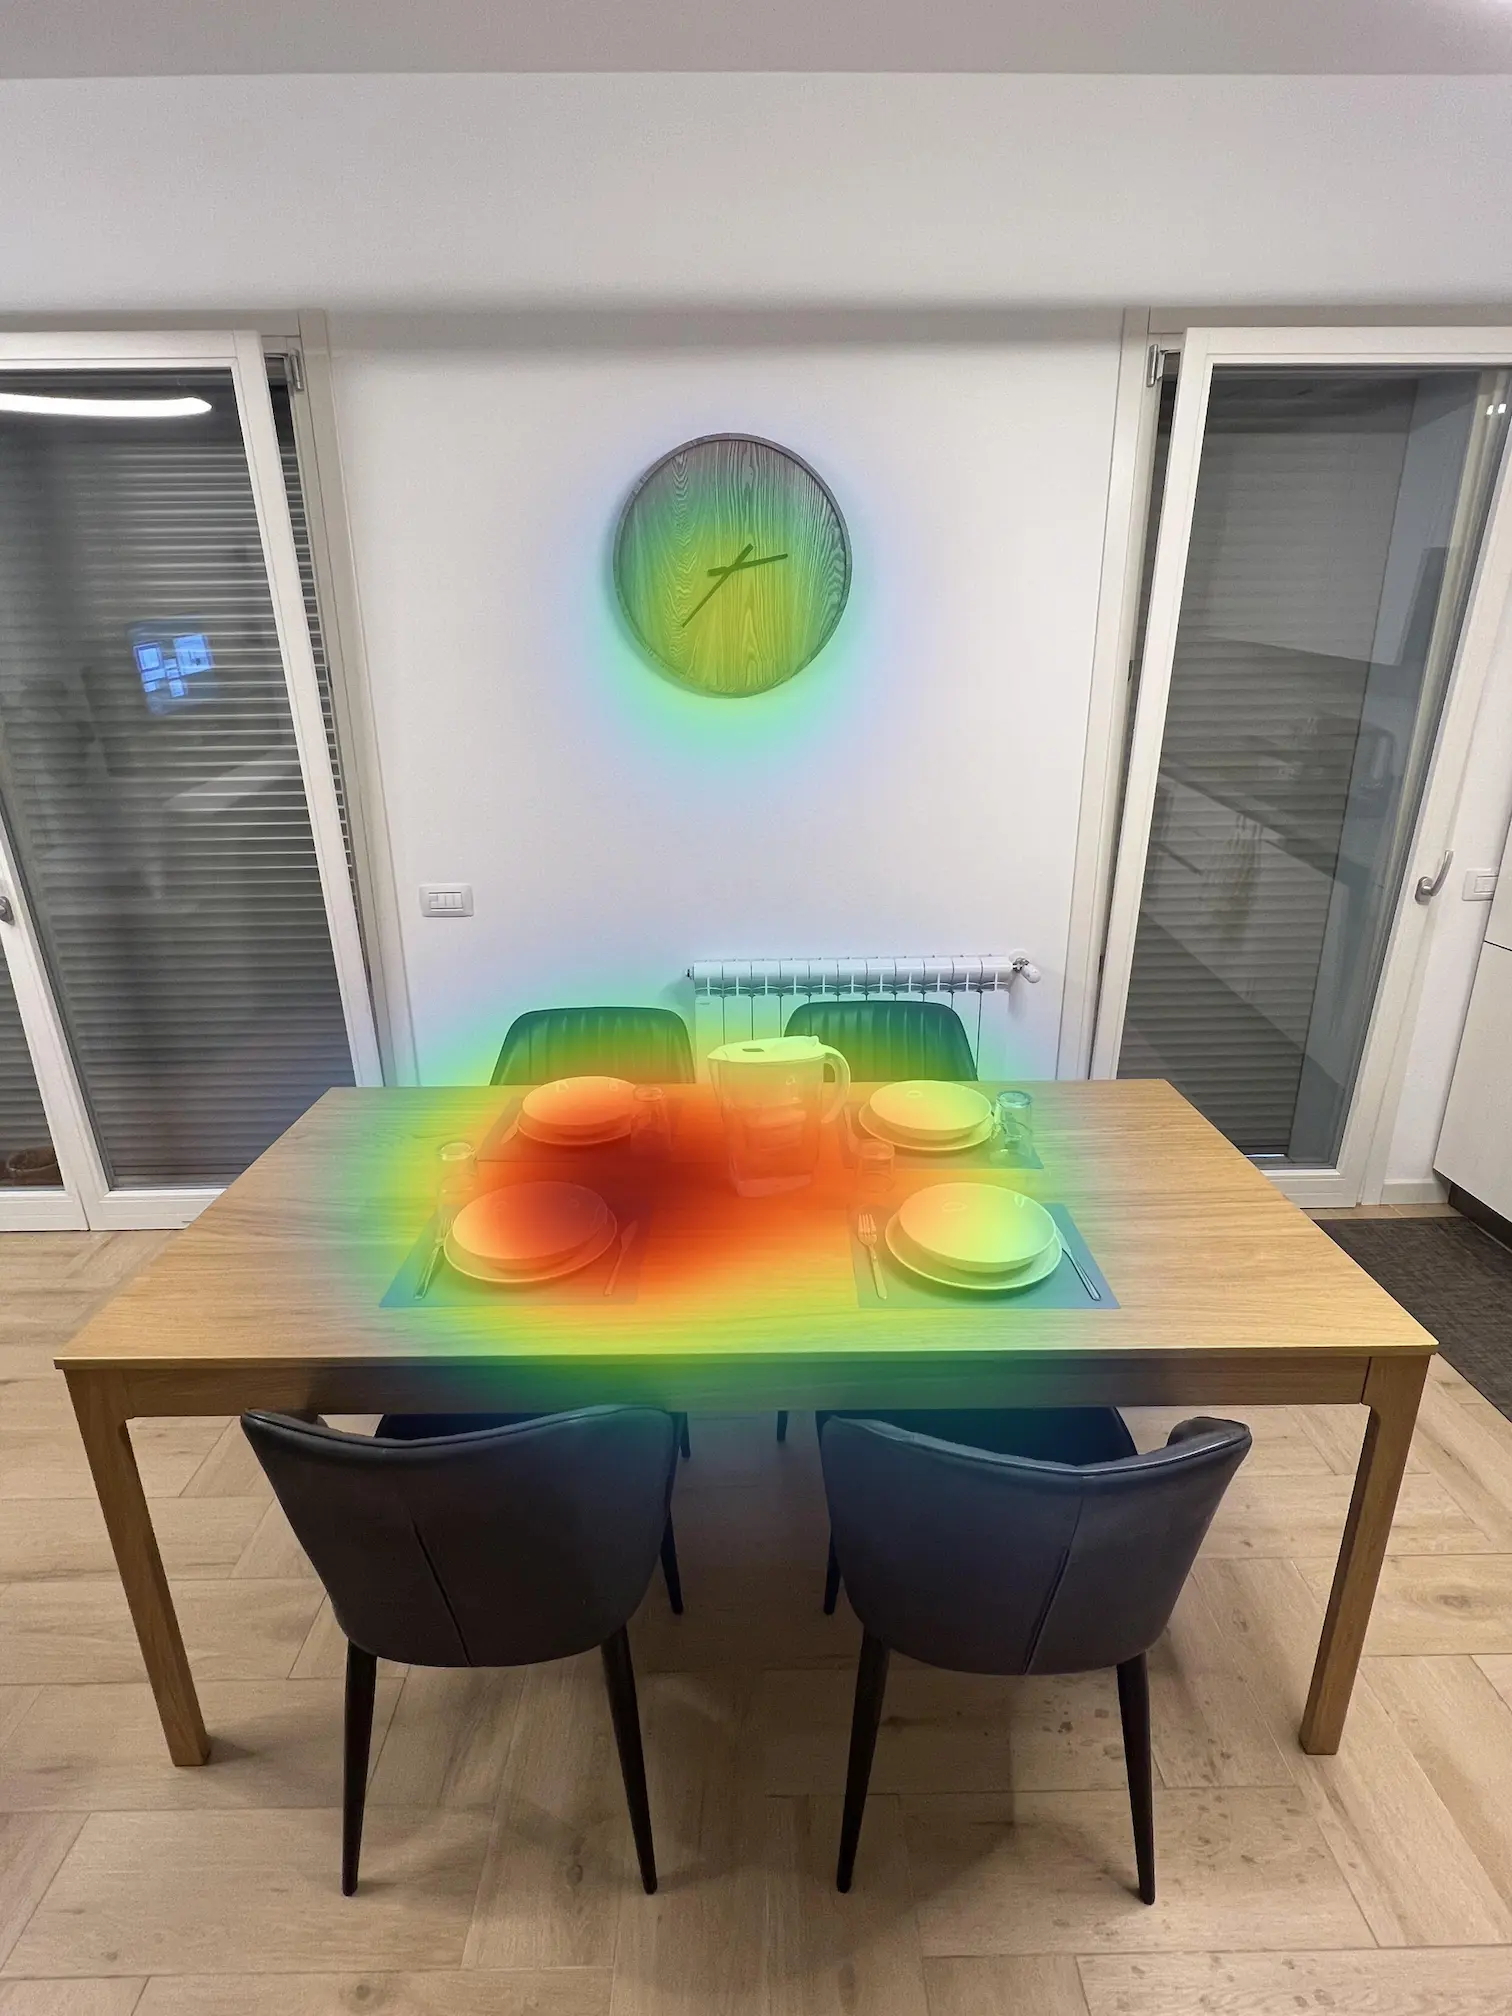
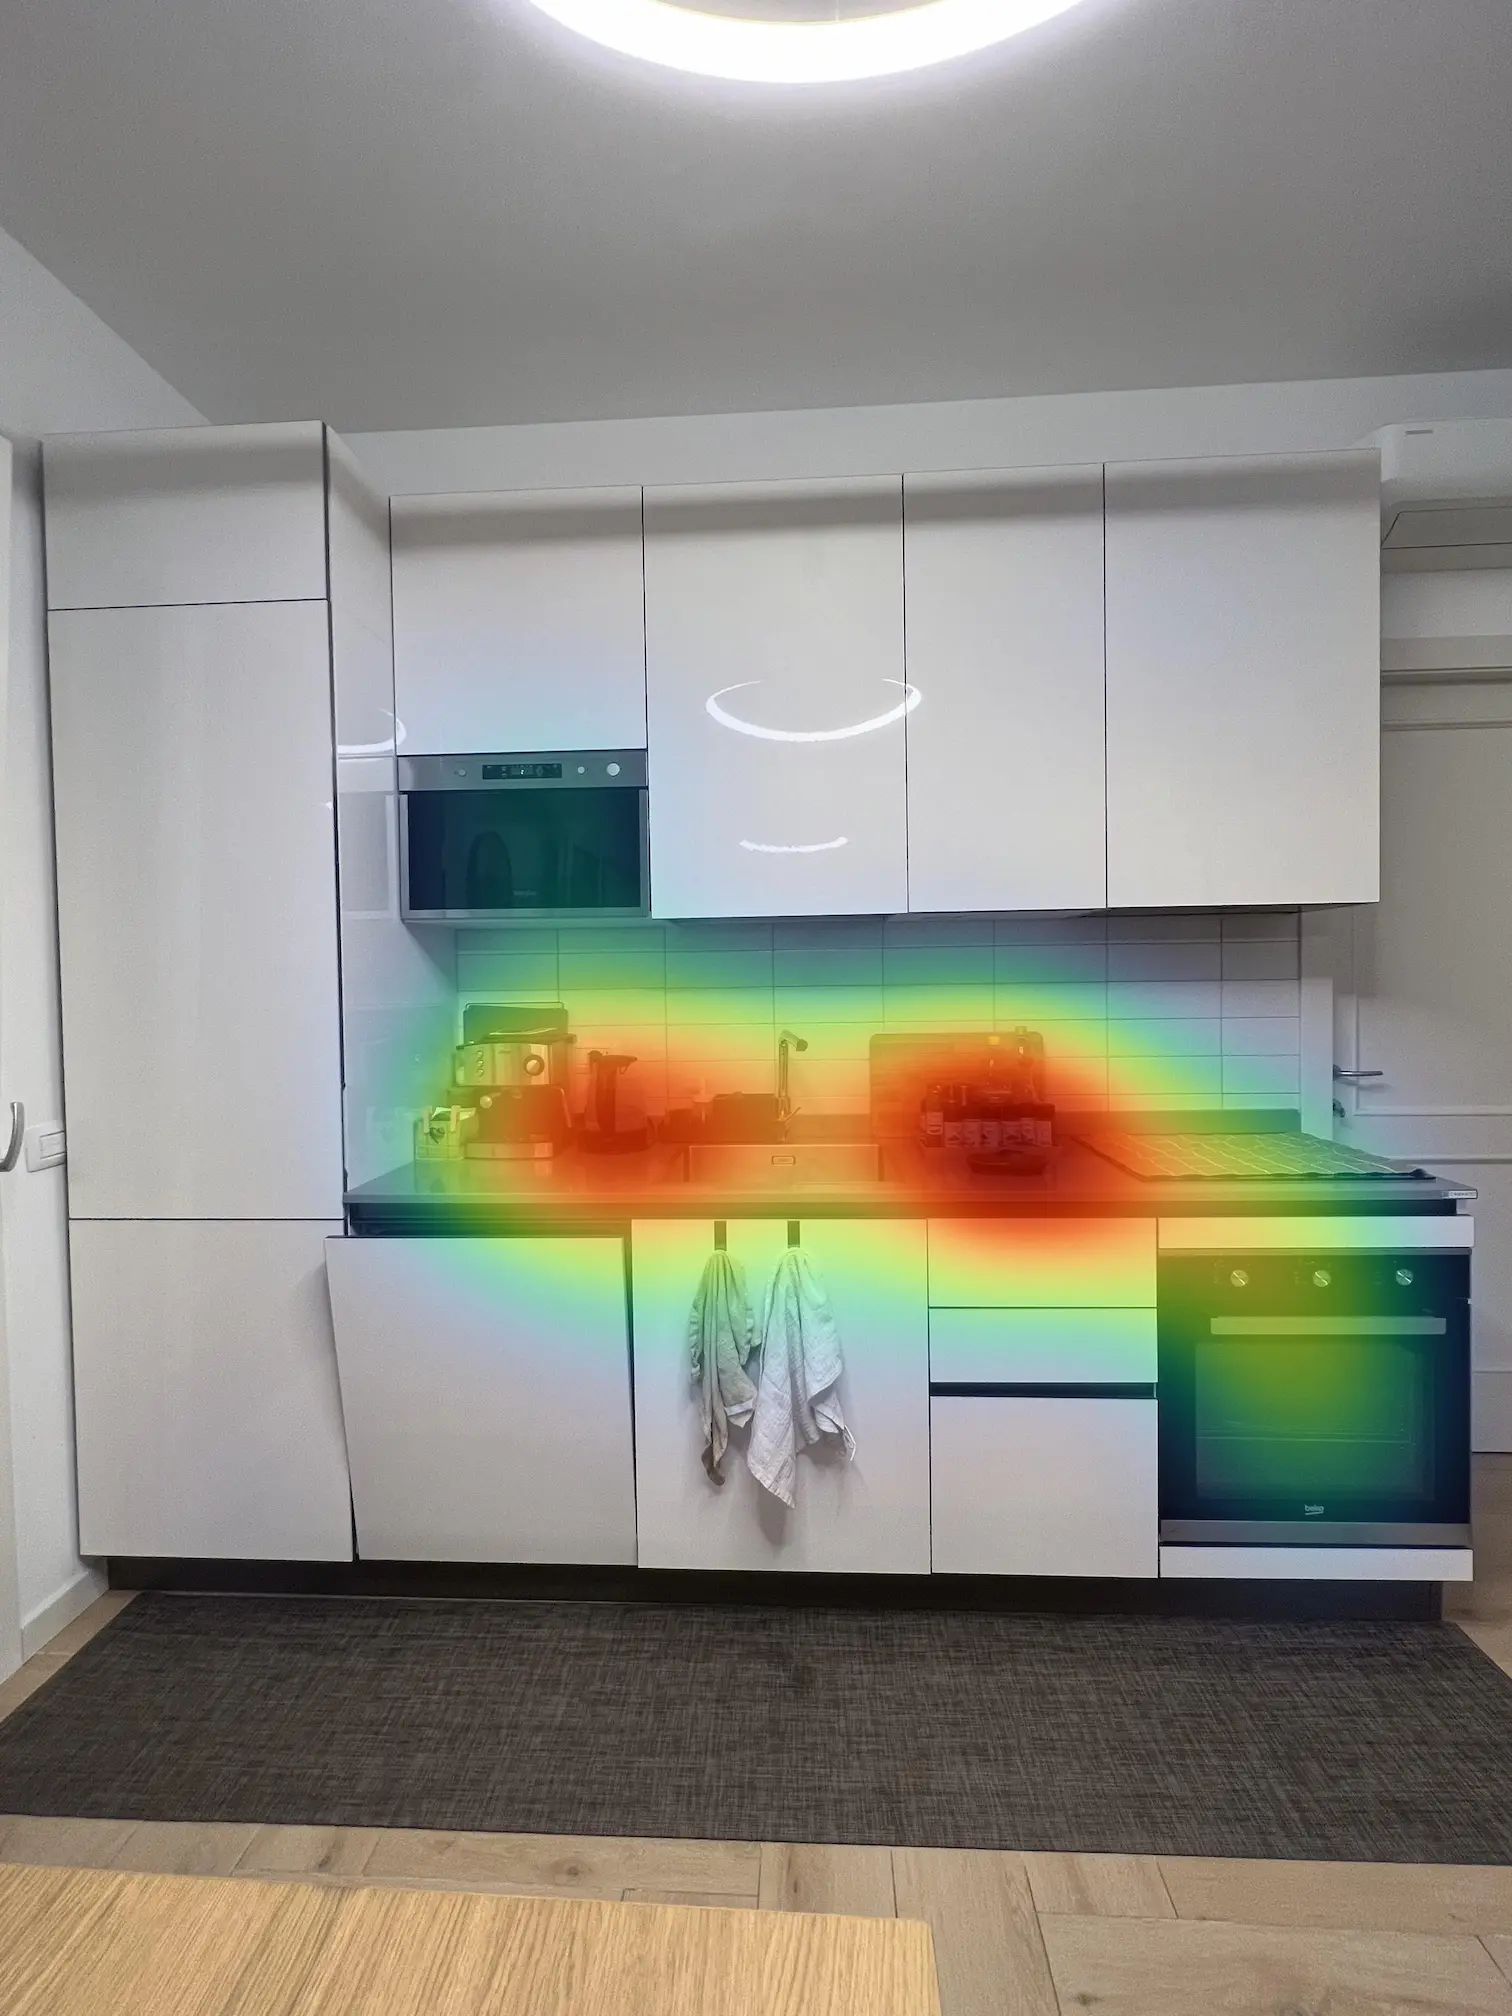
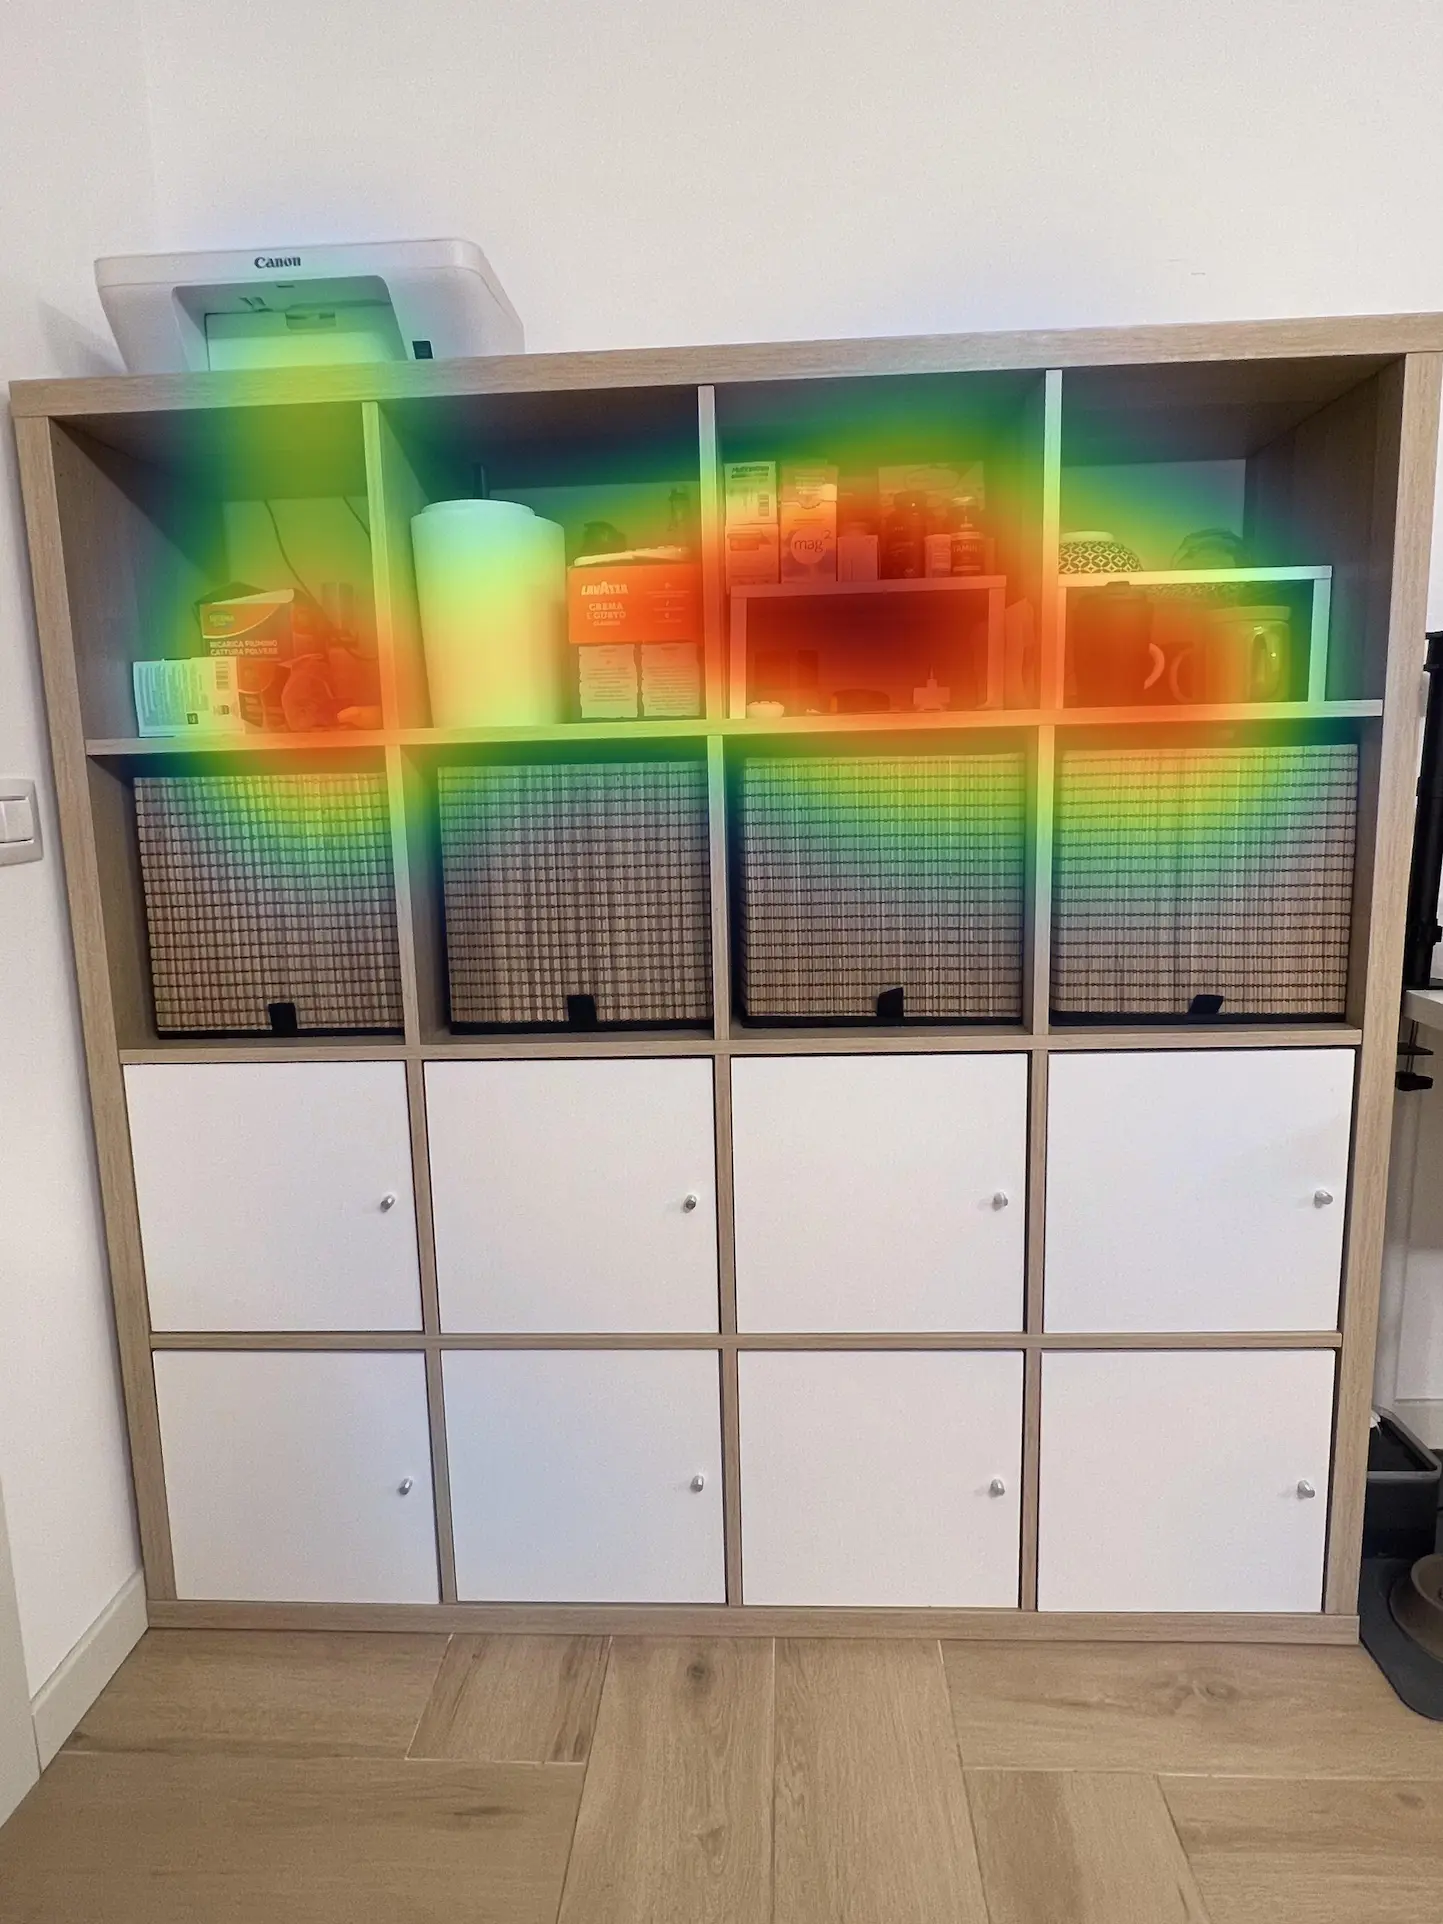
- Capture Reference Images: Take pictures of the areas or objects within the environment you wish to investigate. Here are some example pictures of different areas and pieces of furniture in our environment (a living room, dining area, and kitchen):
- Record Scanning Videos: For this guide, we used five separate scanning recordings to cover the environment. If you have a bigger or more complex environment, it might be necessary to use more. On the other hand, it might be possible to use fewer if you have a smaller environment or if you can capture sufficient data. Remember, each scanning recording must be under 3 minutes in duration.
Check out these videos which show how we made the scans (also be sure to follow our best practices for optimal scanning):
TIP
The Reference Image Mapper prefers feature-rich environments. If you have large plain surfaces, like empty tables or countertops, consider placing some strategic items within the environment to increase the chances of successful mapping.
- Eye Tracking Recordings: Make an eye tracking recording while the participant(s) freely explore and visually interact with various elements within the environment. (You can of course make these prior to the reference images and scanning recordings).
Add Custom Events: During the eye tracking recording, users may focus on a specific region once or multiple times. I.e. they may revisit that region. By adding custom event annotations corresponding to these periods, you can create sections for the enrichments to be computed. This enables you to run each enrichment only on the section(s) of recording where a certain region is being gazed at. For this guide, we used the following event annotations to run five Reference Image Mapper enrichments:
- Desk:
desk.beginanddesk.end - TV area 1:
tv1.beginandtv1.end - TV area 2:
tv2.beginandtv2.end - Table:
table.beginandtable.end - Kitchen:
kitchen.beginandkitchen.end - Cupboard:
cupboard.beginandcupboard.end
- Desk:
Create and Run the Enrichments: You will need to create a separate enrichment for each reference image. A reasonable naming scheme could correspond to each area of the environment, like ‘cupboard’, ‘desk’ etc. In the temporal selection of each enrichment, be sure to use the appropriate events labels. E.g. for ‘cupboard’, you would use
cupboard.beginandcupboard.end. Now, run the enrichments to map the subject's gaze from the recording onto the multiple reference images you captured.
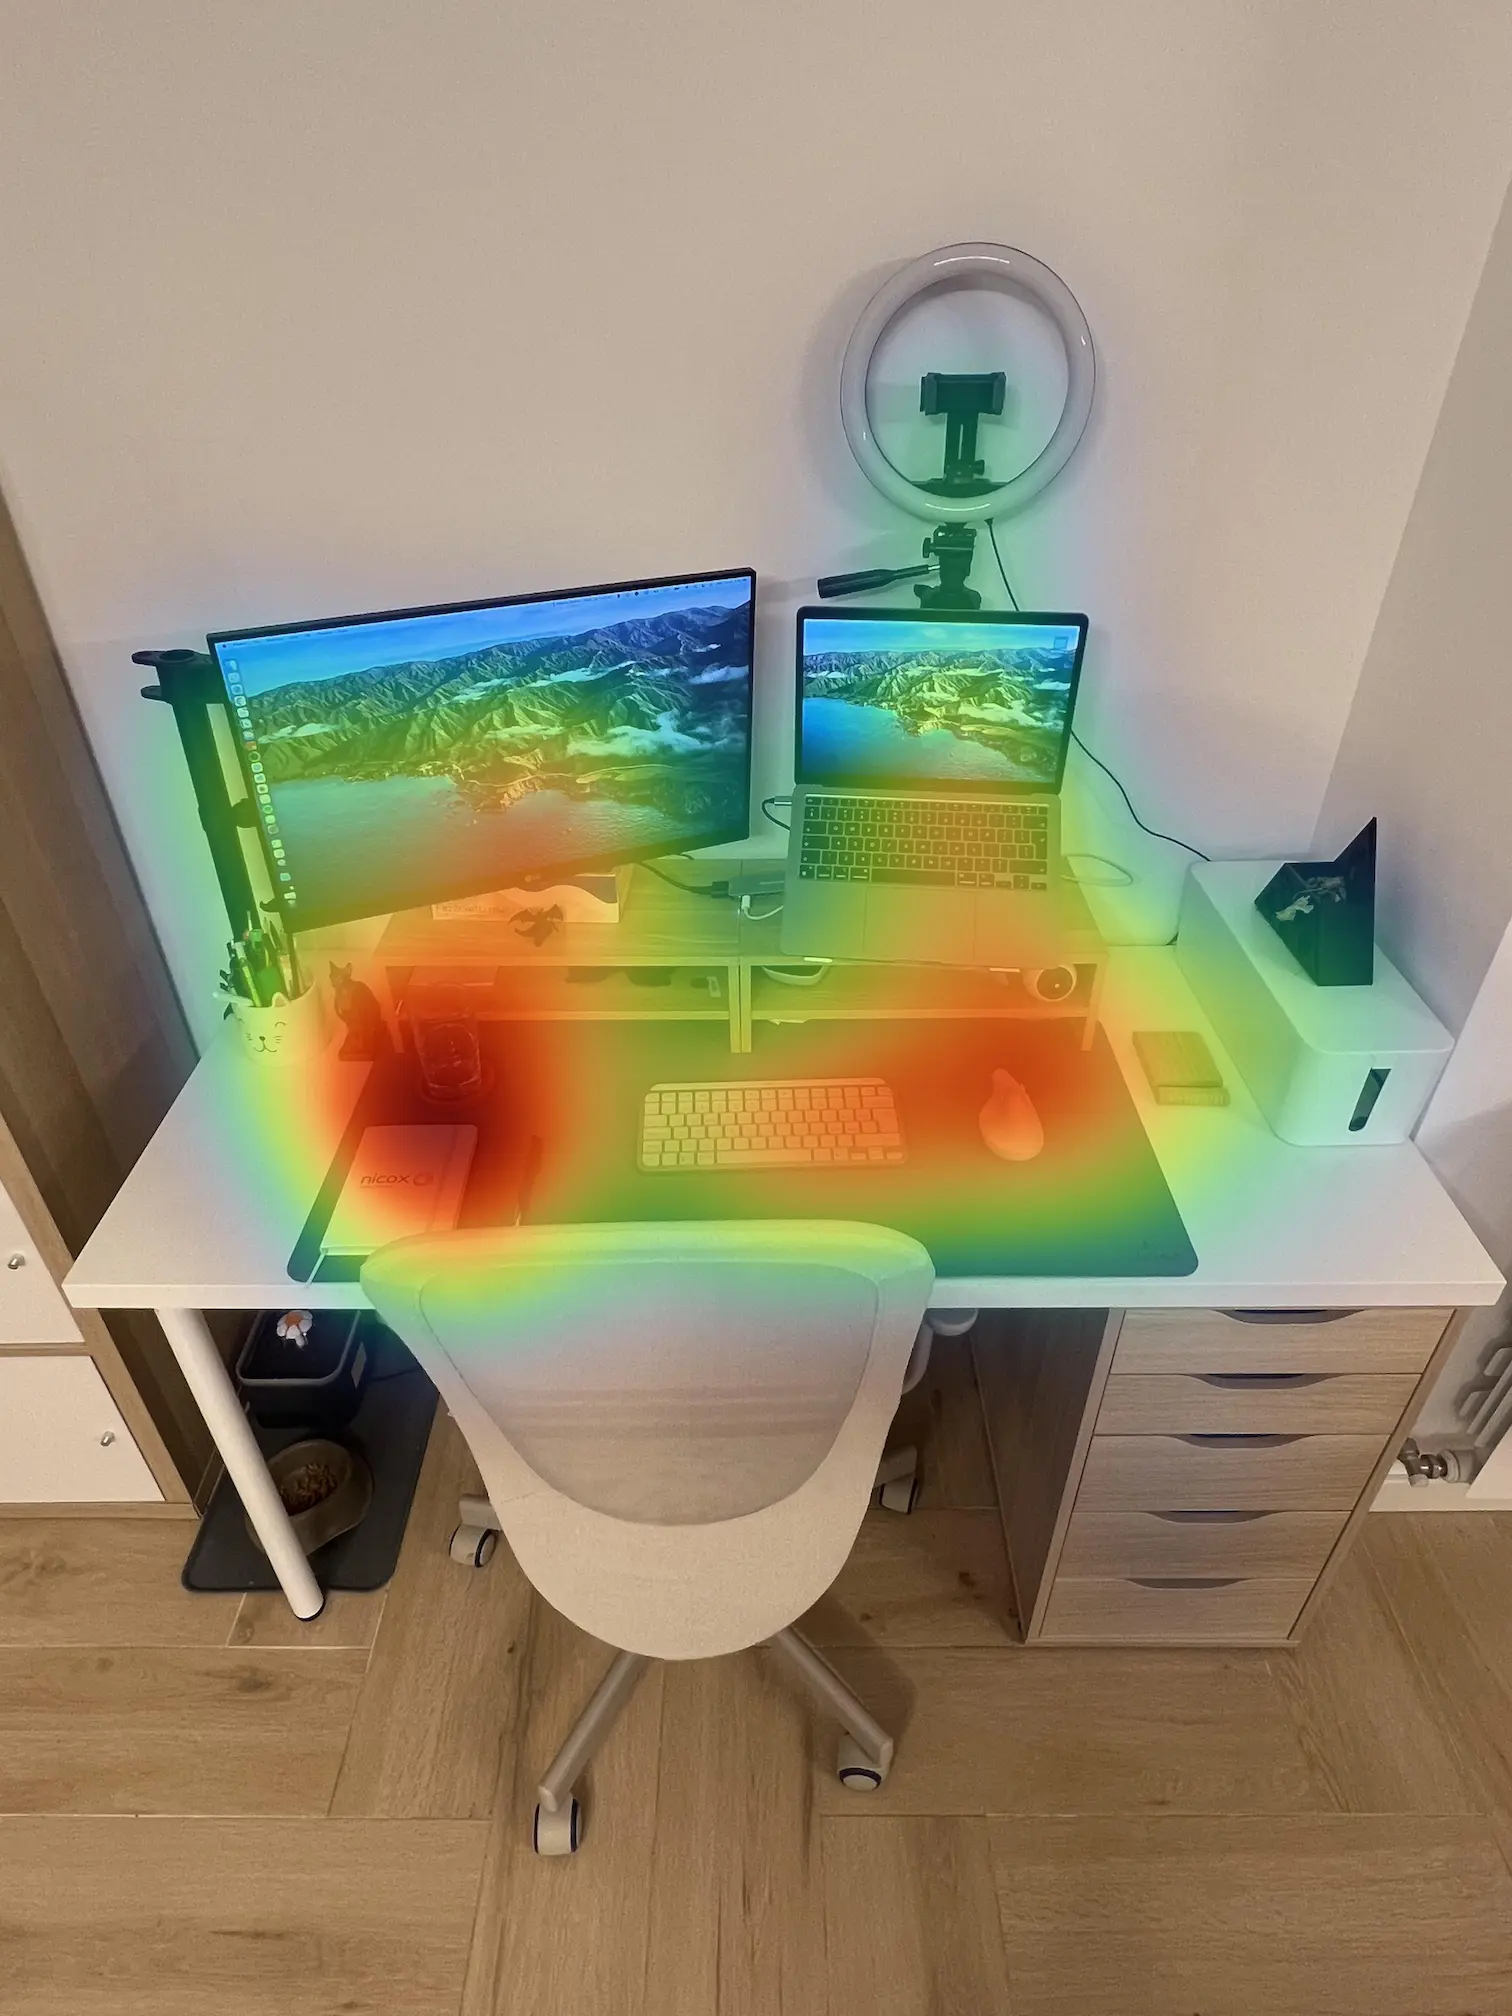
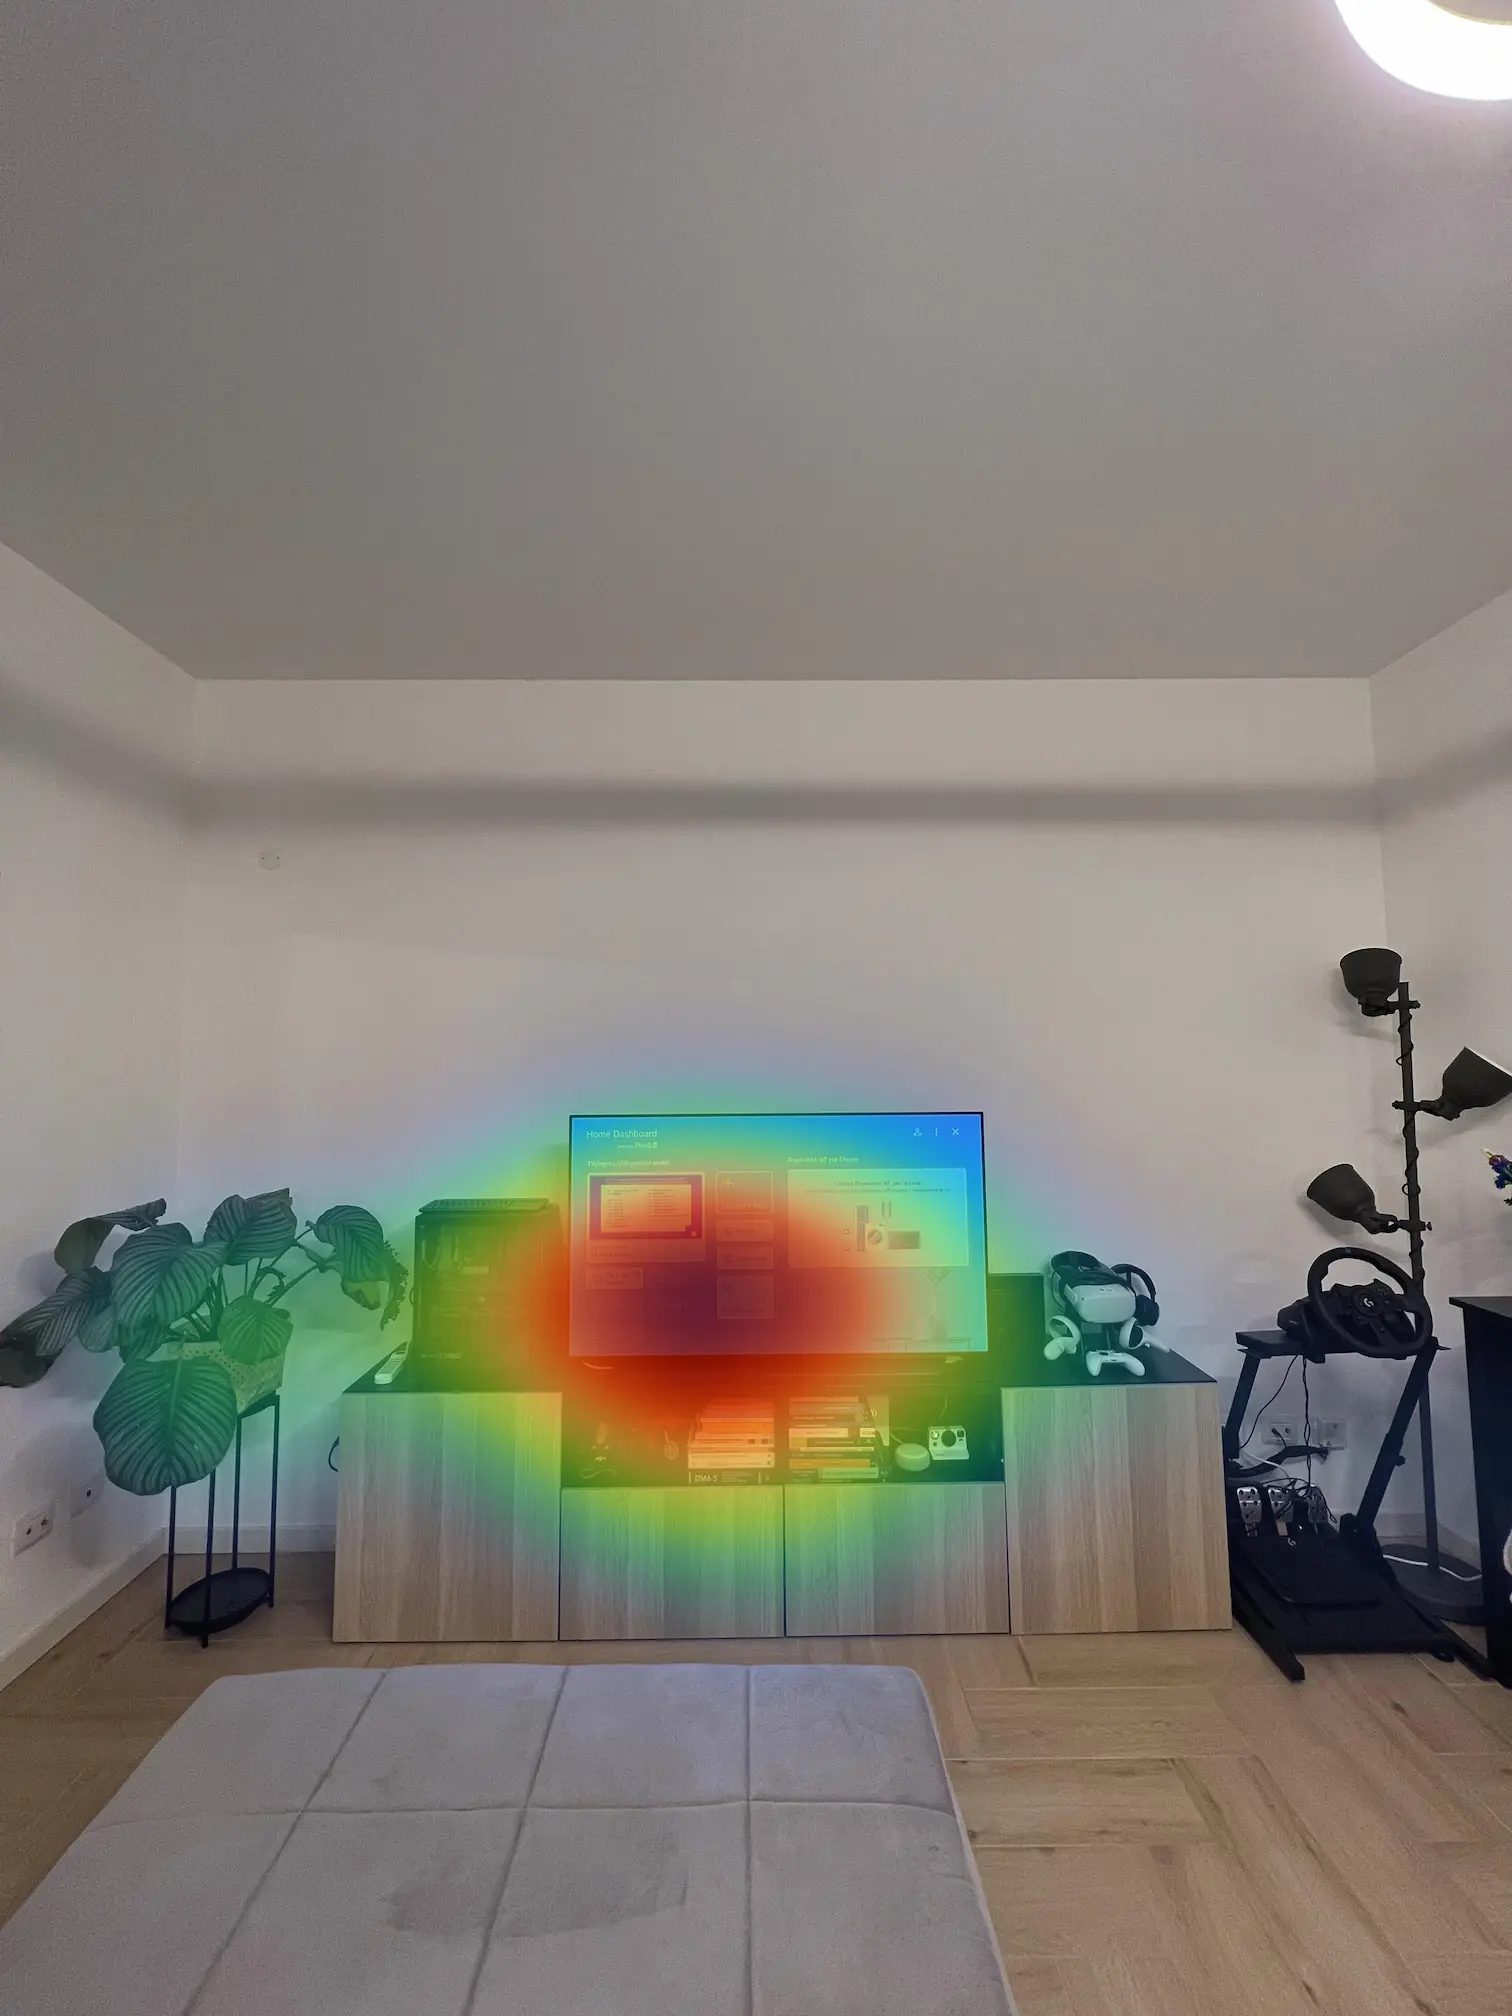
Final Results
Once the enrichments are completed, you can view the heatmaps which illustrate areas which attracted more gaze. Additionally, you'll have the option to download gaze and fixation data mapped within the bounds of the pictures, enabling you to conduct further in-depth analyses.
TIP
If you need assistance in running the Reference Image Mapper, reach out to us via email at info@pupil-labs.com, on our Discord server, or visit our Support Page for dedicated support options.
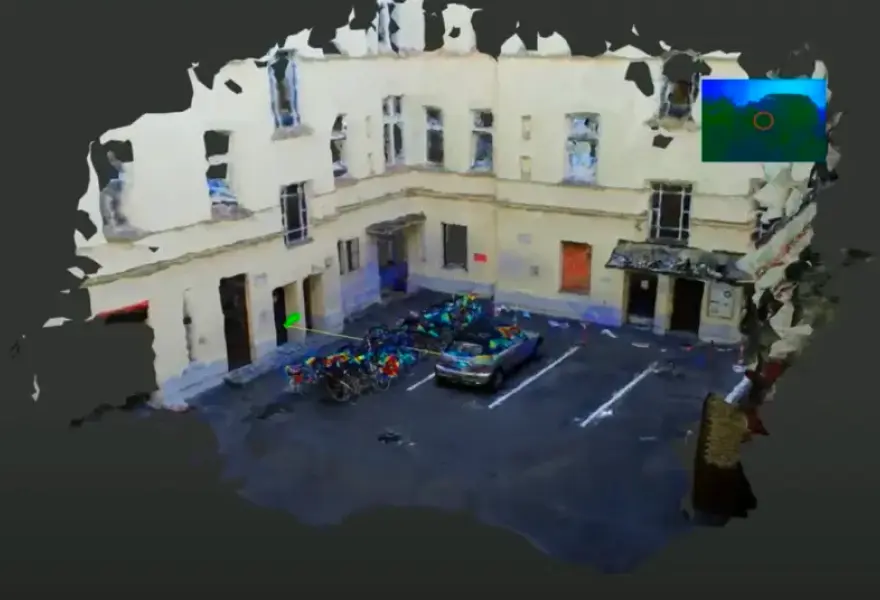
Map Gaze Onto a 3D Model of an Environment
Map gaze onto a 3D model of an environment and visualise gaze patterns as 3D heatmaps using Pupil Cloud's Reference Image Mapper and Nerfstudio.
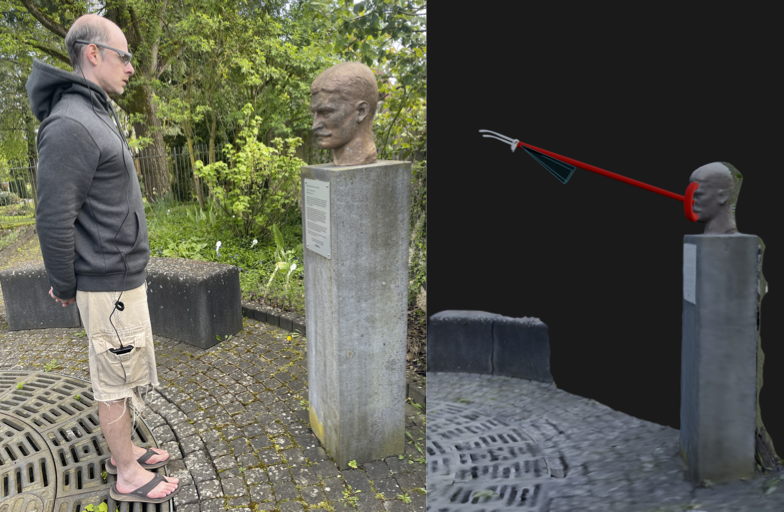
Map Gaze Into a User-Supplied 3D Model
Map gaze, head pose, and observer position into a 3D coordinate system of your choice using our Tag Aligner tool.
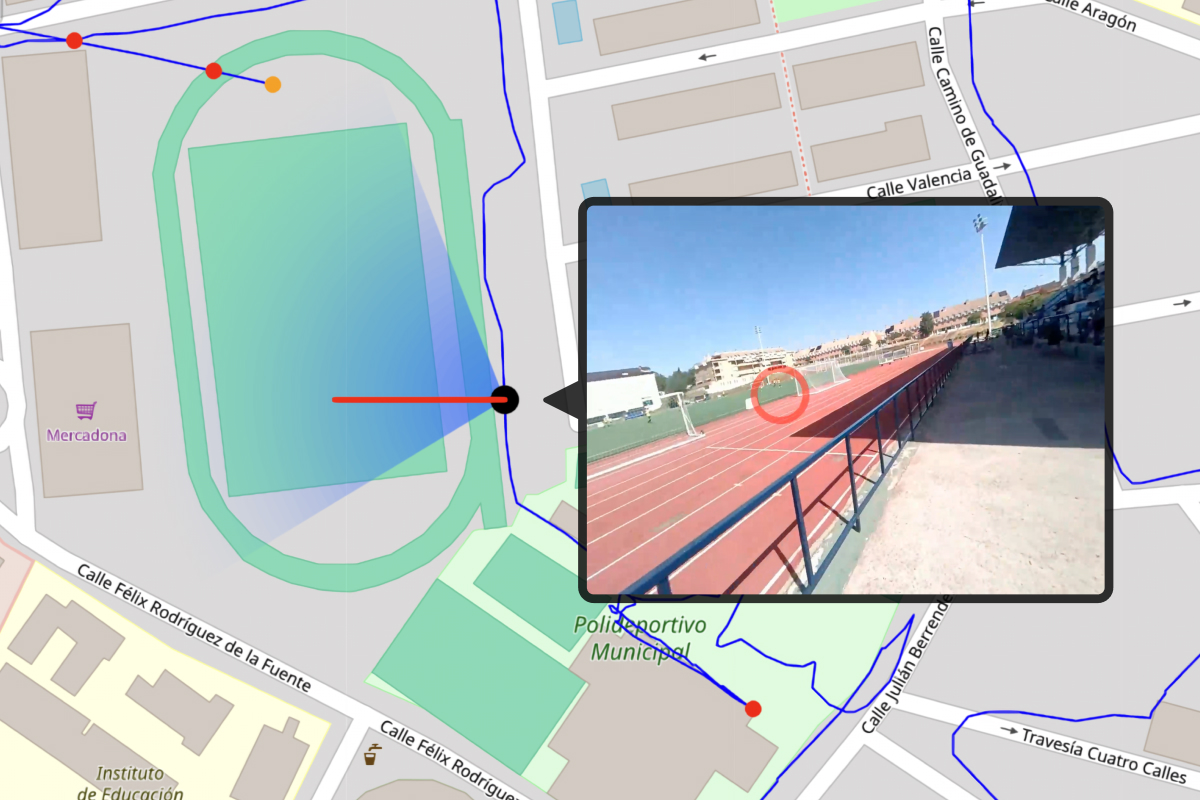
Where did I see that? Eye Tracking & GPS
Use a GPS, like the one in Neon's Companion Device, to record synchronized location, eye, and head movement data. Visualize it on a map and click to jump there in your recording!