Map Gaze Onto Dynamic Screen Content
In this guide, we will show you how to map and visualise gaze onto a screen with dynamic content, e.g. a video, web browsing or any other content of your choice, using the Reference Image Mapper enrichment and a few clicks.
TIP
Note: This tutorial requires some technical knowledge, but don't worry. We made it almost click and run for you! You can learn as much or as little as you like.
What You’ll Need
Before continuing, ensure you are familiar with the Reference Image Mapper enrichment. Check out this explainer video for reference.
We recommend you run the enrichment, e.g. with a short recording of your desktop + monitor/screen to ensure it's working okay. Once satisfied, you can use the same reference image + scanning recording for your dynamic screen content.
You will also need to know how to record your screen's content (check out the screen recording section to learn how you can do this using the free and open-source program OBS).
Software Requirements
- You will need Python 3.7 or higher installed on your computer.
- Execute the following command
pip install pupil-labs-dynamic-rimin the console to install the required libraries.
If you have the checklist completed, you are ready for the next steps.
Making the Recording
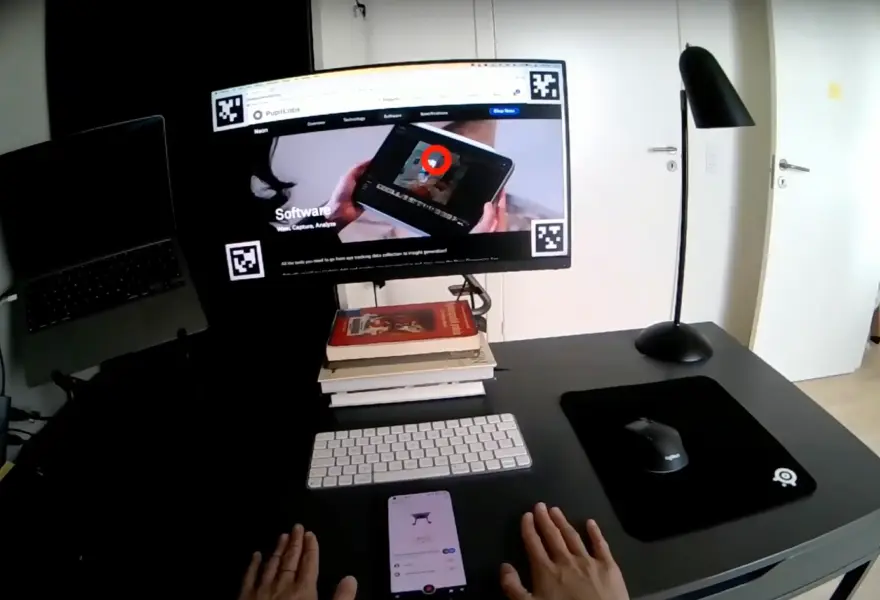
Let's assume you have everything ready to go – your participant is sat infront of the screen wearing the eye tracker, your screen content is ready to play.
So that we can capture your participant's visual interactions with the screen content, we will need to make sure that both the eye tracking and screen recordings happen at the same time.
Importantly, both sources (eye tracking and screen recording) record individually. As such, you'll need what we call an event annotation to synchronise them later.
The event annotation should be used to indicate the beginning of the screen content recording in the eye tracking recording, and be named start.video. Check here how you can create these events in the Cloud.
TIP
When you initiate your recordings, you'll need to know when the screen recording started, relative to your eye tracking recording. Thus, start your eye tracker recording first, and make sure that the eye tracker scene camera faces the OBS program on the screen. Then, start the screen recording.
By looking at the screen when you press the button, you'll have a visual reference to create the event annotation later in Cloud.
Recap: Eye tracking first; screen recording second
Once You Have Everything Recorded
Create a new Reference Image Mapper enrichment, or add your new eye tracking recordings to an existing enrichment. Run the enrichment, and download the results of the enrichment from Cloud once it's computed.
Now you'll need to get the timeseries and scene video from your new recording(s). Download them by clicking on downloads at the bottom left side of the page in the project's view.
Running the Code
Now you can run the code by executing the following command in your console:
pl-dynamic-rim
The application/script will prompt for a series of user inputs:
- Select the folder path to the Reference Image Mapper download. This folder should contain gaze.csv, sections.csv files and the reference image
- Select the subfolder corresponding to Timeseries & Scene Video export of the eye tracking recording you are using. This directory should contain event.csv, gaze.csv, world_timestamps.csv, and video files (don't select the folder with the scanning recording you made of the scene)
- Select the video from the screen display
DANGER
Wrong video! Be sure to carefully select the video of the screen recording; do not choose the eye tracking video!
We can't choose the video for you 😉!
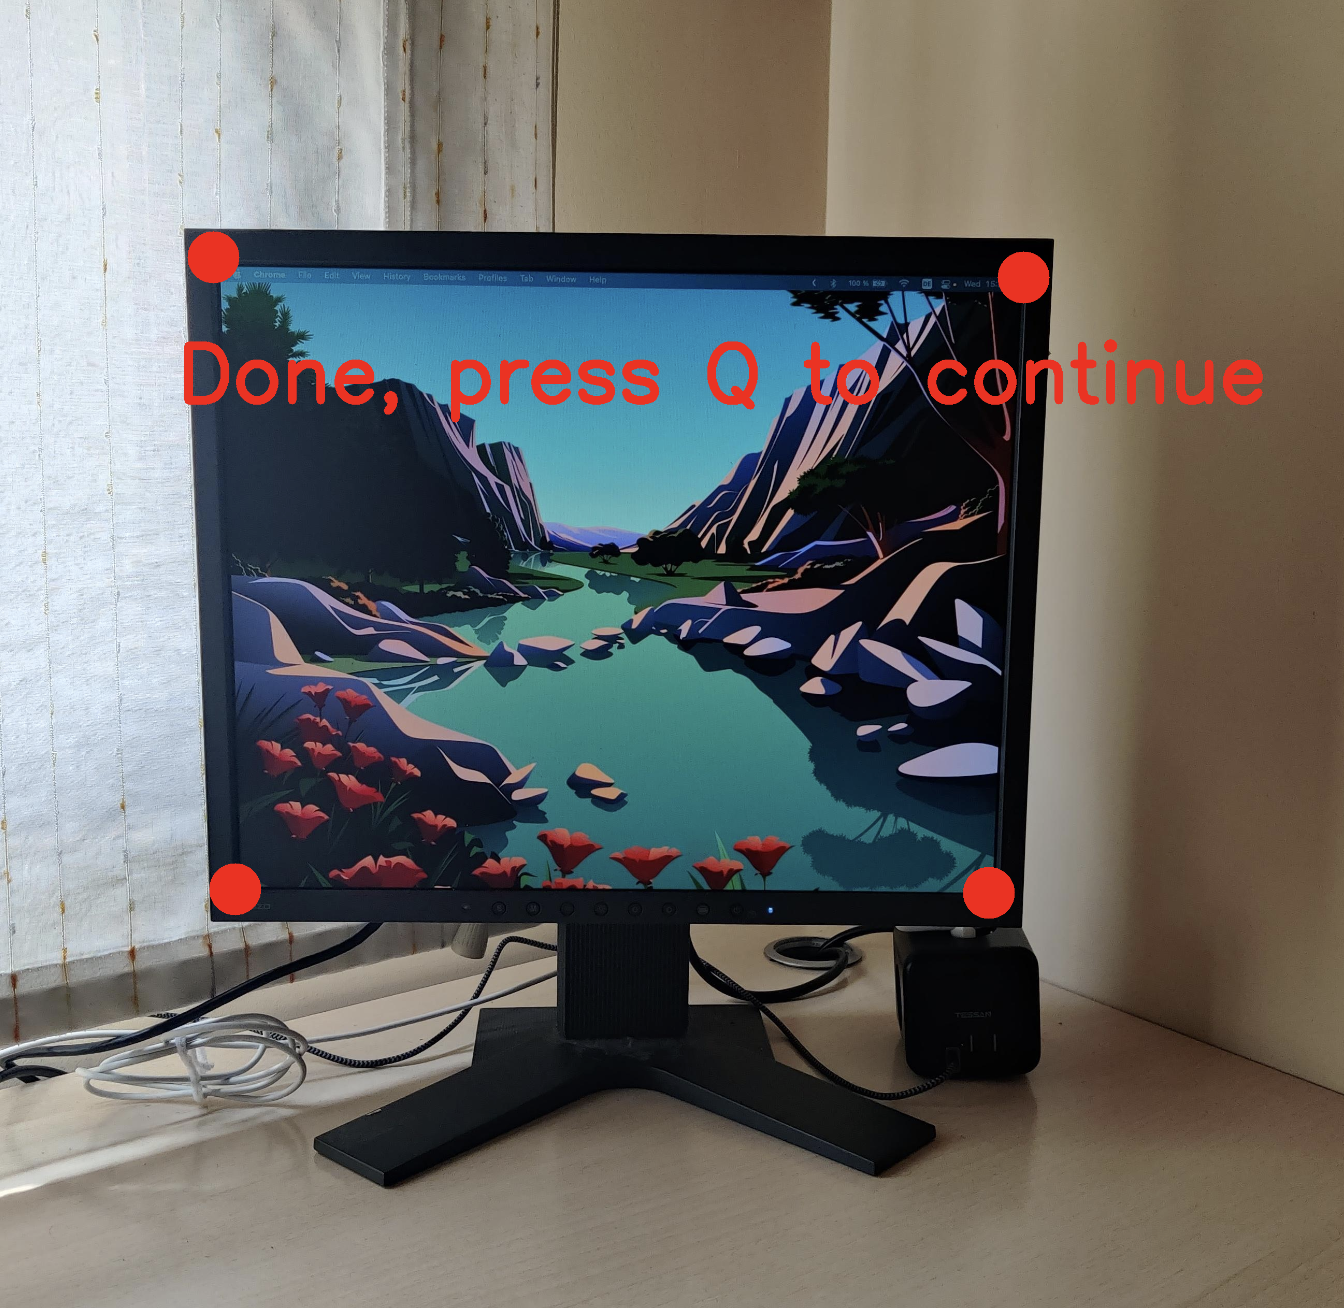
- A window will show you the reference image and ask you to select the four corners of your screen.
Use the left button on your mouse to select the points. A red dot will let you know if a point has been chosen when clicked, and if you want to remove the last point, use the right button of your mouse. When the four corners are selected, you will need to press “Q”.
- Select the folder where you want to save the final video and the CSV file with the gaze coordinates transformed to screen coordinates. (0,0) corresponds to the upper left corner.
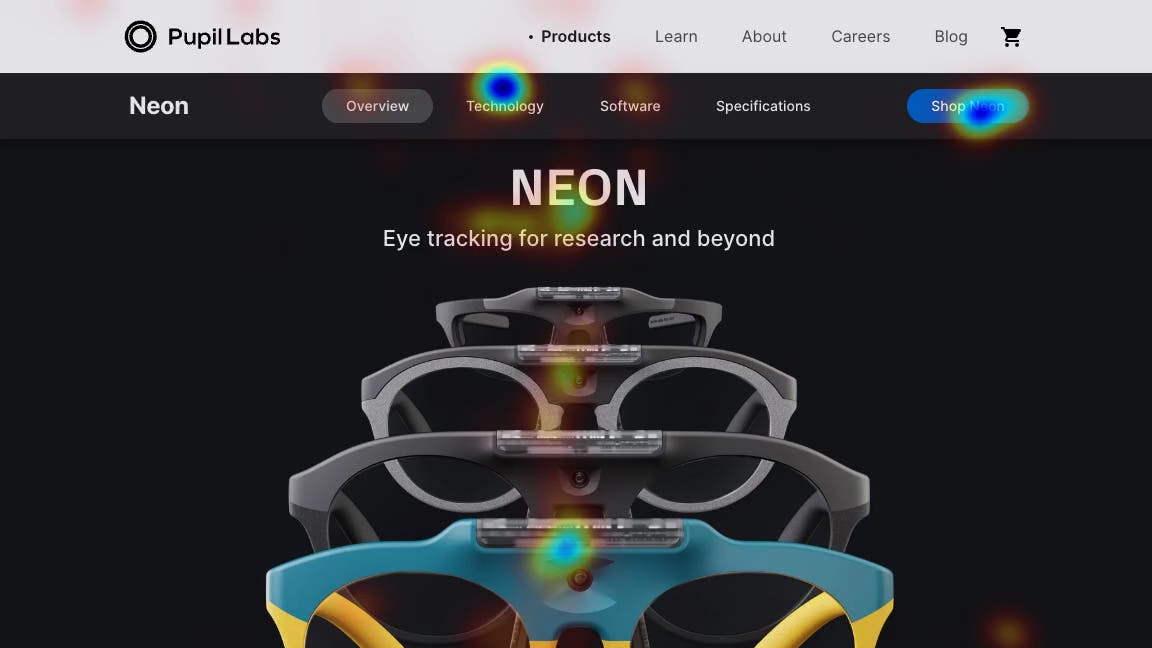
And that's all required from you! Grab a coffee or a tea and chill. When finished, you will get a video like the one at the top of this how-to, in addition to a CSV file with your gaze mapped to the screen.
WARNING
You might find some libav.mp4 warnings. These warnings are due to some issues with the aac codec and timestamping. These messages only appear when adding the audio stream. You can safely ignore them, or you can disable audio within the code.
How the Code Works
If you only want the final visualisation and the data, there is nothing else you need to do. However, if you want to dig deeper into how the code works under the hood, continue reading by clicking on the dropdown below.
Read More
The code is hosted at https://github.com/pupil-labs/dynamic-rim-module.
Navigate to src/pupil_labs/dynamic_content_on_rim/. You will first notice that we split the code into several modules. The core functionality is in the script dynamic_rim.py. Under the uitools folder, you will find the code used to ask for paths, directories or even to ask for the screen corners. And under the video/read folder is the script to read the timestamps or find a frame for specific timestamps.
In summary, we read the .csv files into Pandas data frames. We use pyav to obtain the timestamps/presentation times for each frame on the videos, and we use OpenCV to get the transformation matrix and apply it to the gaze coordinates. We then merge the data using the timestamps and finally decode the right frames, work with them and encode them again.
You can find below a short description of the main functions.
Reading Timestamps
# on video/read.py
def read_screen_video()
This function takes the video path and decodes every frame from the stream, reading their presentation and decoding timestamps and frame index. It returns these values together with an estimate of the frames per second. An optional argument can be given to read audio streams rather than video.
Merging Timestamps
# on dynamic_rim.py
def merge_tables()
Once the timestamps files have been read into Pandas Dataframes, we can match them using the function pd.merge_asof(). The function above (merge_tables) merges all the sources: screen, scene, reference image gaze coordinates, frames indexes, etc., in the proper order so that all of them match in the final video.
Getting the Coordinates of the Screen and the Perspective Transformation
# on uitools/get_corners.py
def pick_point_in_image()
Takes the path to the RIM download folder and the number of points to collect. It will use OpenCV to load the reference image to the user, downscale to avoid issues with HDPI screens and save the points selected, giving red dots over the image as feedback.
# on dynamic_rim.py
def get_perspective_transform()
With the corners selected, this function uses OpenCV’s function cv2.getPerspectiveTransform to obtain the transformation matrix, which is later applied in the main function using cv2.perspectiveTransform to remap the RIM’s gaze coordinates into screen’s coordinates.
Saving the Video
# on dynamic_rim.py
def save_videos()
This function takes care of producing the final resulting video.
# on video/read.py
def get_frame()
This function will iterate, look for and decode the frame whose presentation timestamps match those required for that frame.
# on dynamic_rim.py
def prepare_image()
With the frame withdrawn in the previous function and converted to an image, the gaze will be plotted on top, it will be resized if needed, and the screen patch will be drawn. The different steps to be performed will depend on the source of the frame.
Screen Recording
You can use any software of your choice to record your screen, but if you do not know how to do so, here is a small guide from Gauging Gadgets.
Summary
- Download and install OBS from obsproject.com
- Launch OBS and on the bottom left, create a new scene.
- Add a display capture source and select your monitor.
- Configure your settings and click start recording on the bottom right.
TIP
It is at this moment that you should create the annotation in your eye tracking recording (but don’t worry, you can create it later in the Cloud, just be sure the eye tracking is facing the button, so you have a visual reference for later.)
- To stop recording, click the stop button in OBS. You can find your recording in the output directory.
Like a Pro
If you want to start your screen and eye tracking recordings automatically (no visual reference required) using network event annotations, we've got you covered!
Click Here To Learn About Recording Your Screen Like a Pro
Assuming you have OBS installed and correctly set up, you will need to install the OBS WebSocket plugin.
Follow the installer's instructions, and click on "Tools > obs-websocket Settings" when finished. A pop-up will appear and let you modify the settings. There are two parameters we will need for later, the port and the password.
But for now, let's go back to your Python console and install the following packages:
pip install simpleobsws pupil-labs-realtime-api
The first package will help us access the WebSocket API from OBS, and the second is our real-time API wrapper for Python.
Download the script recording.py. As you can see, the script uses asynchronous calls to send WebSockets without blocking each other. Go to lines 76 & 77 and modify them according to the parameters we had in the obs-websocket settings.
- L76:
url="ws://localhost:XXXX/"where XXXX is the port number you use, defaults to 4455.
DANGER
Do not use 8080! Pupil Invisible uses this one for the real-time API.
- L77: Password -> Obvious, isn't it?
Once everything is set, you only have to run recording.py.
This will automatically connect to Pupil Invisible, launch OBS in your system, wait (5s) for it to be fully open, and then send a signal to start recording in OBS along with a "start.video" annotation to your Pupil Invisible.
TIP
If you need assistance in implementing this guide, reach out to us via email at info@pupil-labs.com, on our Discord server, or visit our Support Page for dedicated support options.

Uncover Gaze Behaviour on Phones
Capture and analyze users' viewing behaviour when focusing on small icons and features of mobile applications using Neon eye tracking alongside existing Cloud and Alpha Lab tools.
Build Gaze-Contingent Assistive Applications
Build your very own gaze-contingent assistive applications (such as a gaze-controlled input device) using Neon eye tracking and our real-time screen gaze package.
Map Gaze Onto Website AOIs
Define areas of interest on a website and map gaze onto them using our Web-AOI tool.