Skip to content

Neon Player

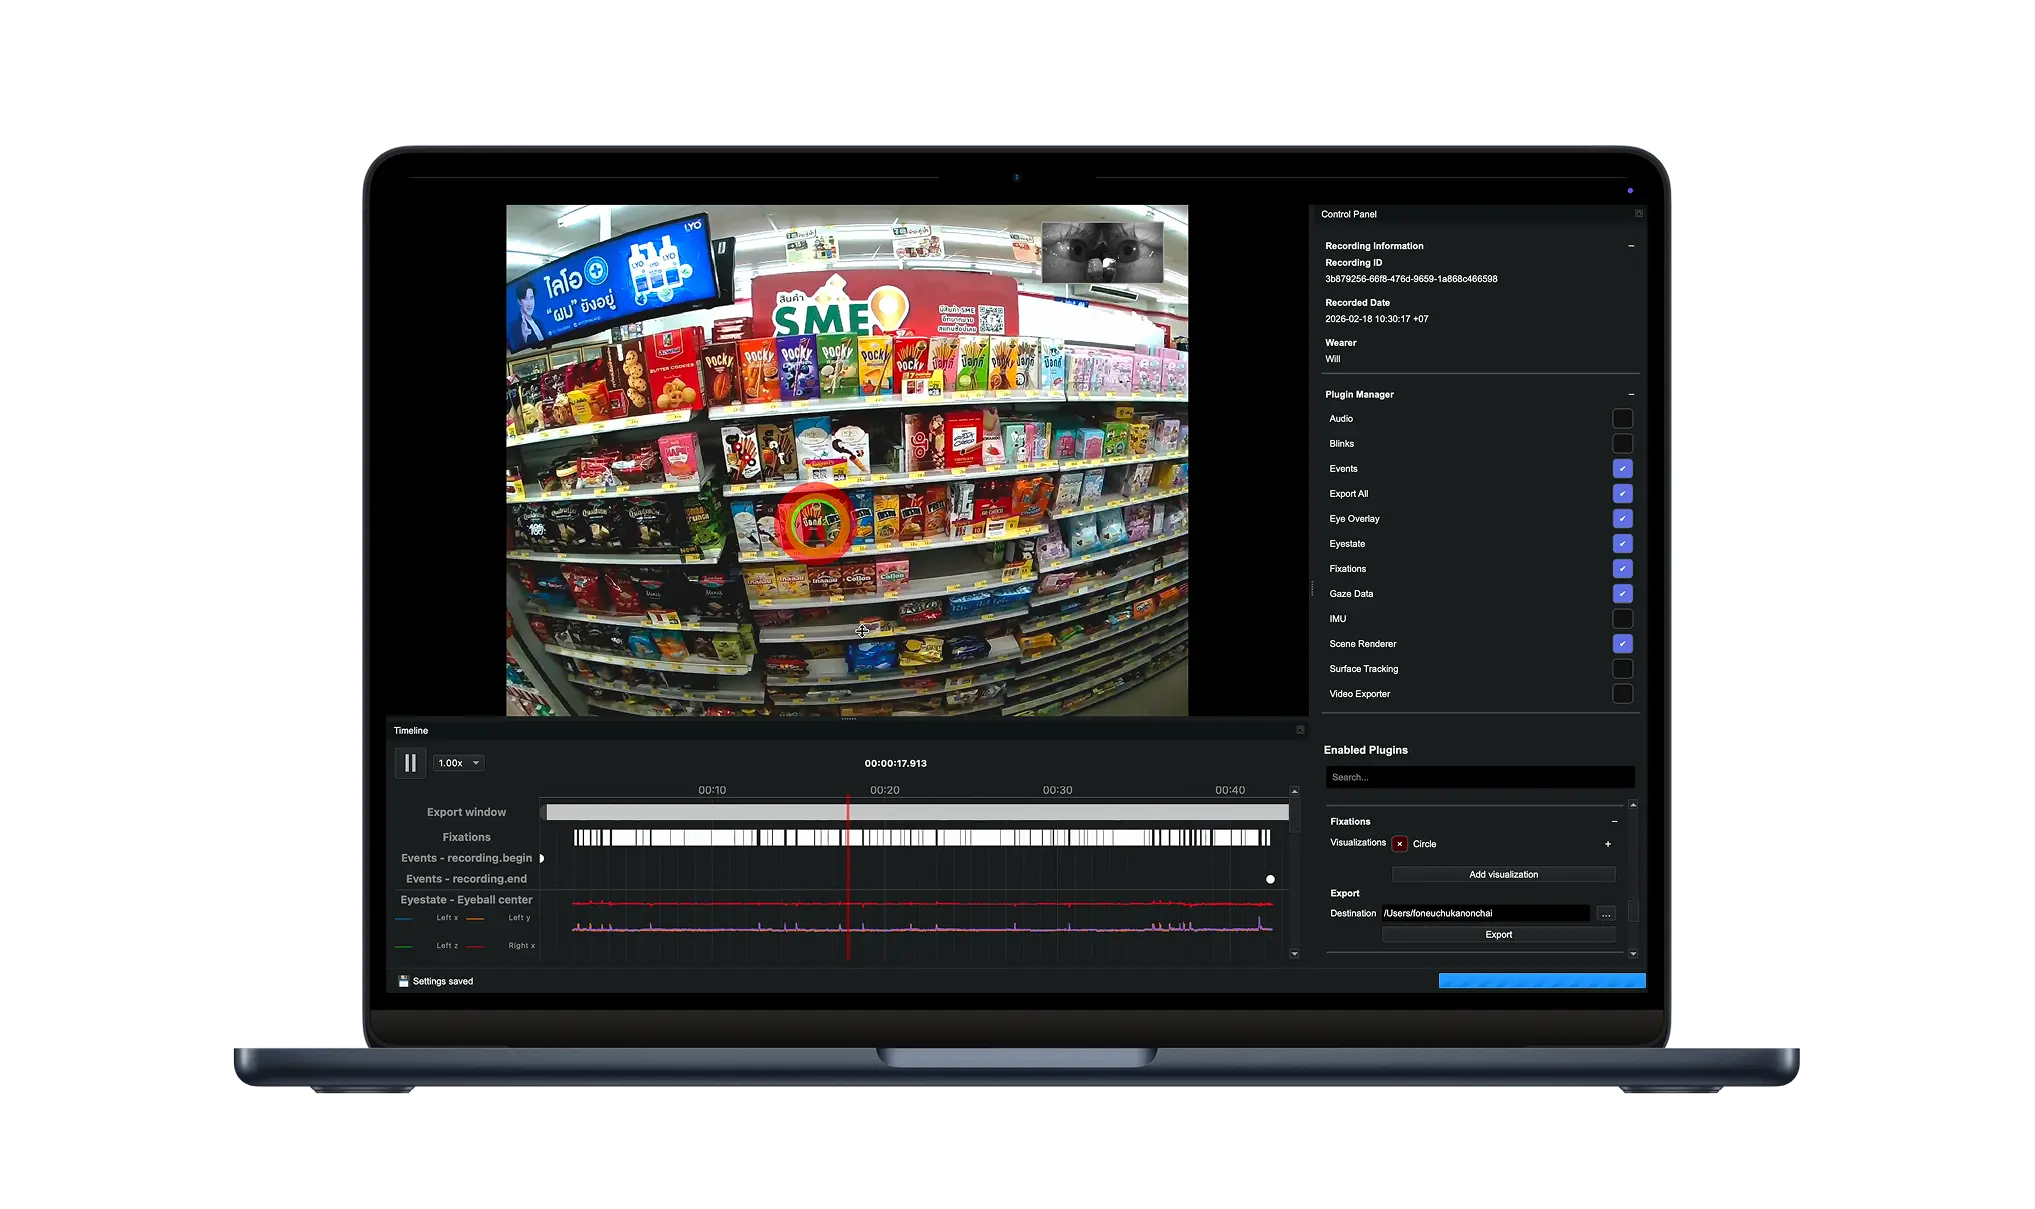
Neon Player is a cross-platform desktop application for playing back and exporting Neon recordings. It runs in an offline context; no interaction with Pupil Cloud is required.

Loading a Recording

To load a recording, you first need to download or export it to your computer:

  1. Direct transfer from Neon Companion Device – For detailed instructions, refer to this guide.
  2. Download from Pupil Cloud – Right-click on a recording in Pupil Cloud, select Download, and ensure you choose the "Native Recording Data" format.

Once you have the recording, open Neon Player and drag-and-drop the folder into the application window.

INFO

Neon Player will never remove or overwrite any of your raw data gathered at the time of recording. Instead, it will create a new folder, neon_player, which contains the Neon Player compatible files.

Drag and drop recording folder

INFO

Recordings extracted from the phone do not contain eye state or pupillometry, and the sampling rate matches that at the time of recording.

Recordings downloaded from Pupil Cloud will be at 200Hz.

Neon Player Window

Neon Player Callout

  1. Graphs: This area contains performance graphs. The graphs display CPU and FPS (FPS = Video playback speed).

  2. Hot Keys: This area contains clickable buttons for plugins.

  3. Timeline Events: Plugins can add temporal events to this expandable panel.

  4. Timeline: Control the playback of the video with the play/pause button (or spacebar on your keyboard). Drag the playhead (vertical line) to the desired point in time.

    • Trimming: Drag the green rounded rectangles at either end of the timeline to set beginning and ending trim markers. The trim section markers specify the section of the video/data to export.
    • Frame Stepping: You can use the arrow keys on your keyboard or the << >> buttons to advance one frame at a time while the playback is paused.
    • Playback Speed: To change the playback speed, use the arrow keys on your keyboard or the << >> buttons during playback. There are 5 available playback speeds: 0.25x, 0.5x, 1x (default), 2x, 4x.
  5. Menu: This area contains settings and contextual information for each plugin.

  6. Sidebar: This area contains clickable buttons for each plugin. System plugins are loaded in the top and user added plugins are added below the horizontal separator.

Keyboard Shortcuts

Keyboard ShortcutDescription
<space>Play and pause video
<arrow left>Step to previous frame 1 / Decrease playback speed 2
<arrow right>Step to next frame 1 / Increase playback speed 2
eStart export
aSurface tracker: Add new surface
xAdd annotation (default keyboard shortcut)
fFixation: Show next
FFixation: Show previous

1 While paused 2 During playback

Plugins

Neon Player uses a plugin framework to add functionality. Visualizations, fixations, blinks, and data exports are all implemented using this structure.

There are two general types of plugins:

  • Unique: You can only launch one instance of this plugin.
  • Not unique: You can launch multiple instances of this type of plugin. For example, you can load one Vis Circle plugin to render the gaze position with a translucent green circle, and another Vis Circle plugin to render the gaze circle with a green stroke of 3 pixel thickness. You can think of these types of plugins as additive.

Exports

You can export data and videos by pressing e on your keyboard, or use the download button in the Neon Player window.

Upon activation, all loaded plugins with export capabilities will initiate the export process. Some exports operate in the background, you can monitor their progress via a GUI progress bar. This allows you to continue working with Neon Player.

Export Directory

Exports are separated from your raw data and contained in the exports subdirectory. Multiple exports will create a new folders, which are auto-named according to their creation order, e.g. 000, 001 etc.

Export Handling

You can select the frame range to export by setting trim marks in the seek bar or directly in the General Settings menu.

Longer running exports, e.g. video exports, go through three phases: Queued, Running, and Completed. Export tasks can be cancelled while being queued or running. Completed tasks are kept in the list for reference.

Workflow

Neon Player is similar to a video player. You can playback recordings and can load plugins to build visualizations.

Here is an example workflow:

  • Start Neon Player and load a recording.
  • Open a Plugin - From the Plugin Manager GUI menu (which can be found in the Sidebar), toggle any Plugin of your choice. The Vis Circle plugin is activated by default.
  • Playback - press the play button or space bar on your keyboard to view the video playback with visualization overlay, or drag the playhead in the seek bar to scrub through the dataset.
  • Set trim marks - drag the green rounded rectangle at the beginning and end of the seekbar to set the trim marks. This will set the start and end frame for the exporter and for other plugins.
  • Export Video & Raw Data - From the Plugin Manager view, load the World Video Exporter plugin and the Raw Data Exporter plugin. Press e on your keyboard or the ⬇ download icon button in the left hand side of the window to start the export.
  • View the exported data in the exports directory.