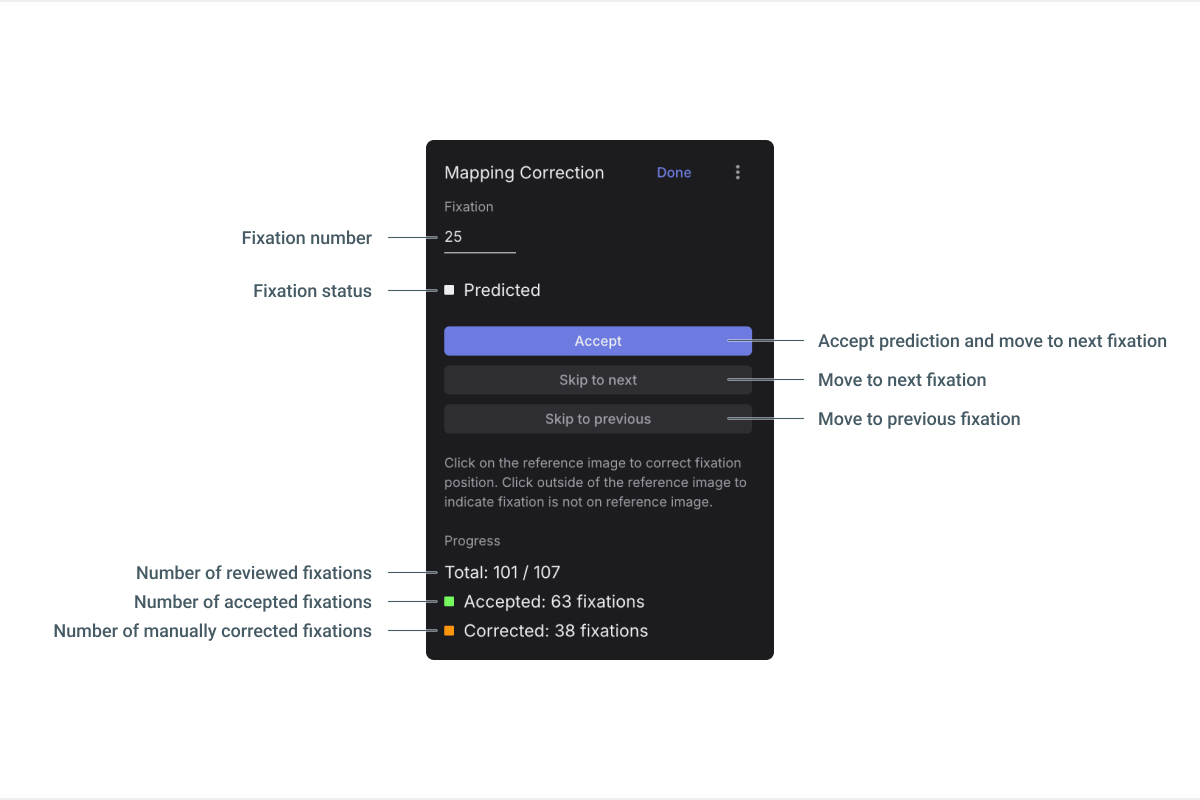
Mapping Correction
There are cases where even the most advanced machine learning-powered gaze mapping algorithms, such as those found in our Reference Image Mapper and Marker Mapper enrichments, struggle due to motion blur and occlusions. The Manual Correction tool puts a "human in the loop" to fill in missing fixations or adjust mapped fixation locations.
Setup
- Enrich: First, run your Reference Image Mapper or Manual Mapper Enrichment, if not already done.
- Correct: After the Enrichment has completed, open it and validate the mapping results. If you need to make corrections, click
Editnext to Mapping Correction to start the interface.- Initially, all fixations are in their default mapped state; i.e., the result of the Enrichment’s automatic mapping process.
- You can
Skip to nextorpreviousfixation with the corresponding buttons. Similarly, you can click on the Recording Timeline to navigate fixations. - You can click on the Reference Image to fill in missing fixations or adjust mapped fixations, and then
Acceptthem. You can also use theDkeyboard shortcut. - If a fixation does not fall on the Reference Image, then click outside of the image.
- You can
Revertany accepted fixations with the corresponding button or theRkeyboard shortcut. - Click
Doneonce you are finished.
You will see the total number of accepted & corrected fixations in the Mapping Correction panel. It shows the fixation currently being mapped, and you can enter a number to jump to a specific fixation.
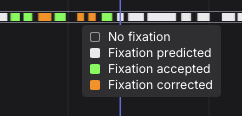
You will also see all fixations and their durations visualized in the timeline below.
TIP
Move between fixations
Use the A and S keyboard shortcuts to move back and forth through fixations. The Shift+A and Shift+S shortcuts take you back and forth through predicted fixations; that is, those which have not been manually corrected.
Export
Once you are done with Mapping Correction, then the output of the Enrichment is automatically updated and can be downloaded. Please refer to each Enrichment’s respective Export Format Documentation: