Pupil Capture
Pupil Capture is the software used with your Pupil Core Headset. The software reads the video streams coming in from the world camera and the eye camera(s). Pupil Capture uses the video streams to detect your pupil, track your gaze, detect and track markers in your environment, record video and events, and stream data in realtime.

World Window
The World window is the main control center for Pupil Capture. It displays a live world camera video feed from your Pupil Core headset.
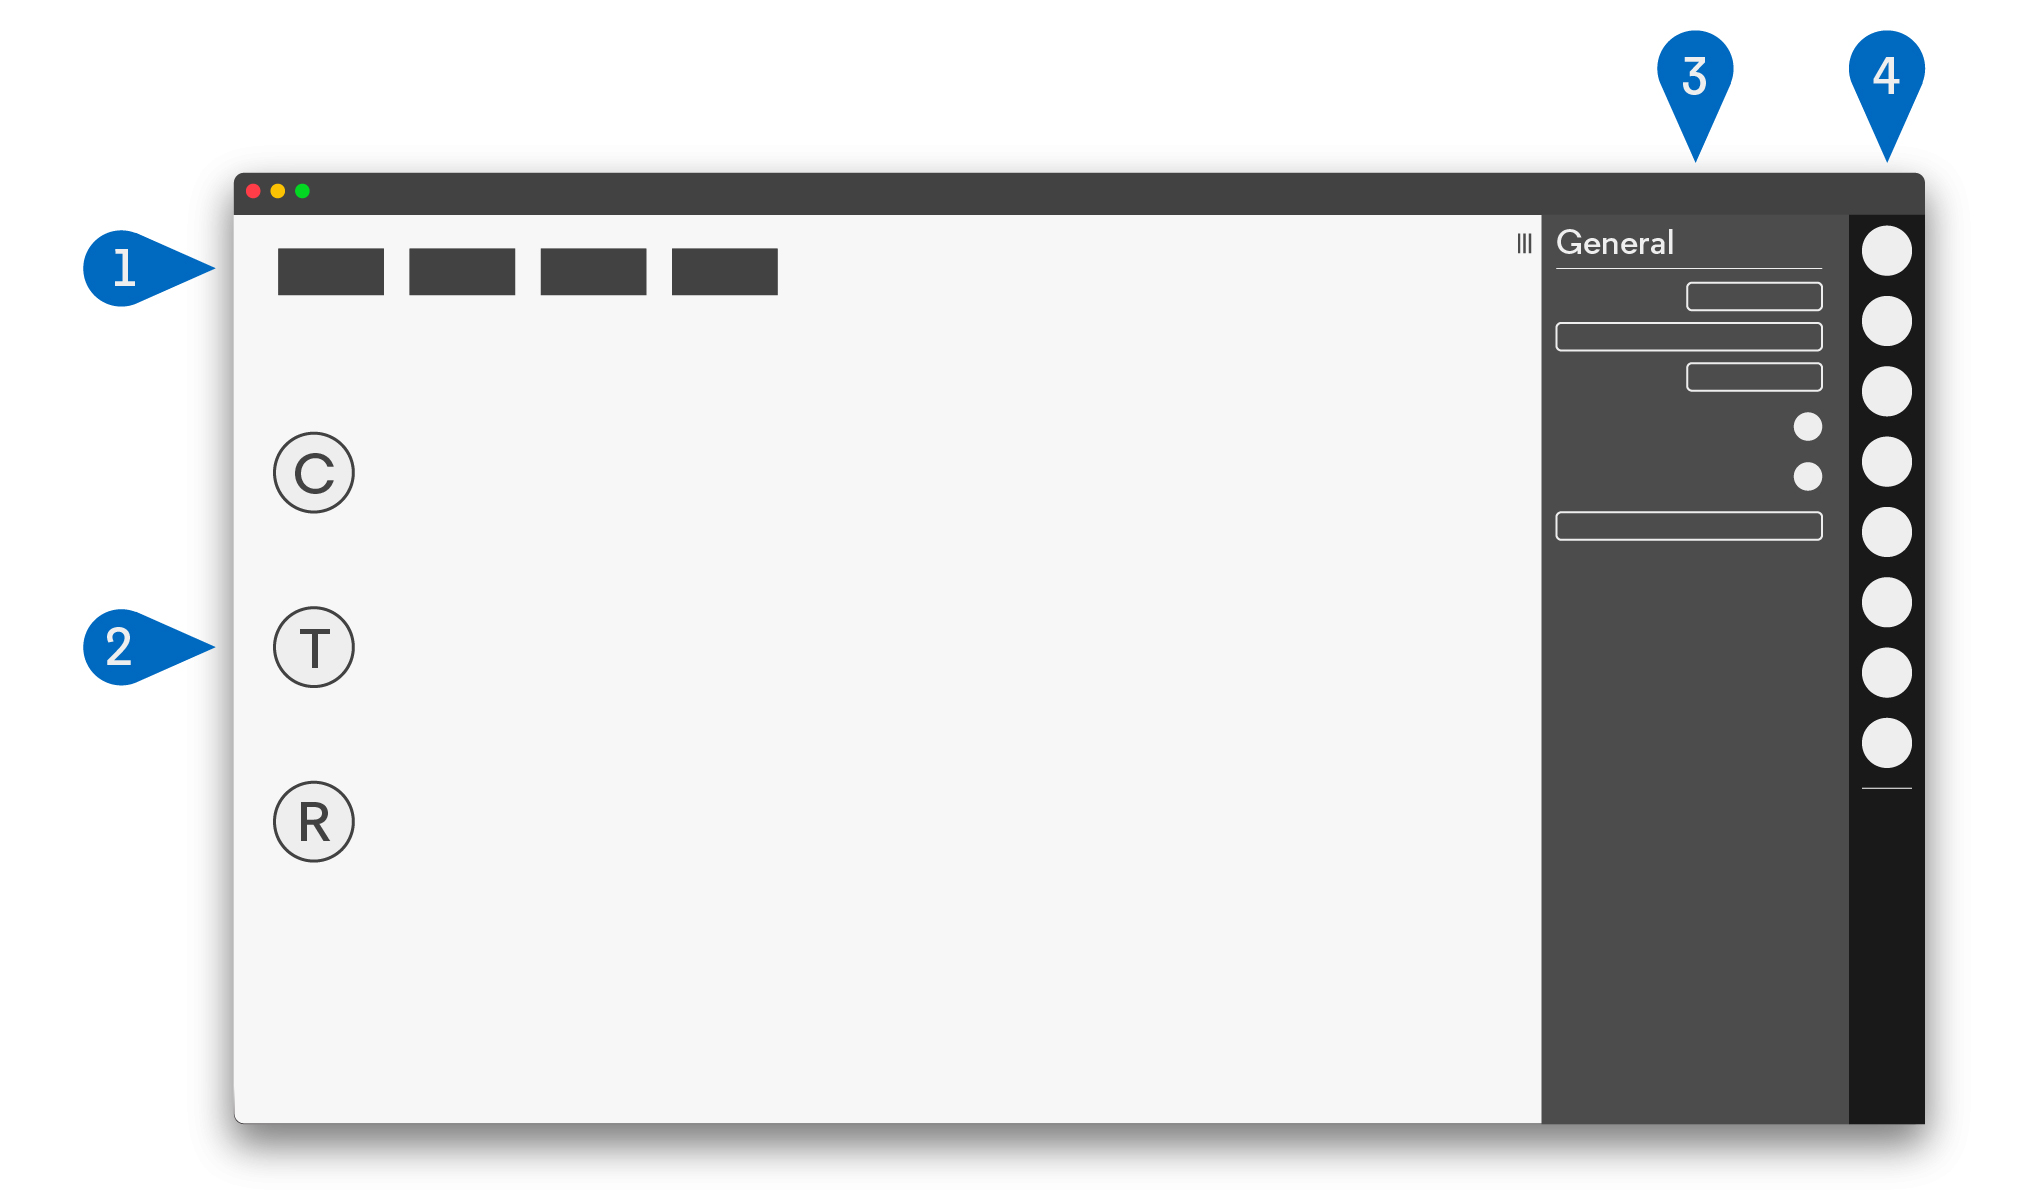
- Graphs: This area contains performance graphs. By default the graphs
CPU,FPS, and pupil algorithm detection confidence will be displayed. You can control graph settings with the System Graphs plugin. - Hot keys: This area contains clickable buttons for plugins.
- Menu: This area contains settings and contextual information for each plugin.
- Sidebar: This area contains clickable buttons for each plugin. System plugins are loaded in the top and user added plugins are added below a horizontal separator.
Keyboard Shortcuts
| Keyboard Shortcut | Description |
|---|---|
r | Start and stop recording |
c | Start and stop calibration |
t | Start and stop validation |
a | Surface tracker: Add new surface |
x | Add annotation (default keyboard shortcut) |
i | Camera intrinsic estimation: Take snapshot of circle pattern |
Video Source Selection
By default Pupil Capture will use Local USB as the capture source. If you have a Pupil Core headset connected to your computer you will see videos displayed from your Pupil Core headset in the World and Eye windows. If no headset is connected or Pupil Capture is unable to open capture devices it will simply display a gray screen.
Troubleshooting
Windows
Videos do not appear in Pupil Capture. This could mean that drivers were not automatically installed when you run Pupil Capture as administrator. You should first try to run Pupil Capture as administrator (right click pupil_capture.exe > Run as administrator). If that does not work, follow the troubleshooting steps below:
- In
Device Manager(System > Device Manager) View > Show Hidden Devices- Expand
libUSBK Usb Devices,Cameras, andImaging Devicescategories. - For each Pupil Cam device (even hidden devices) click
Uninstalland check the box agreeing toDelete the driver software for this deviceand pressOK - Unplug Pupil headset (if plugged in) and plug back in.
- Right click on
pupil_capture.exe> Run as administrator. This should install drivers automatically.
Still having trouble? Chat with us.
Linux
Cameras listed as unknown
If the cameras are listed as unknown and you are not able to access cameras in Pupil Capture. Please try the following:
- Shut down Pupil Capture if it is still running.
- Add your user to the
plugdevgroup by executing the following command in the terminal:
sudo usermod -a -G plugdev $USERButtons not clickable
If you can't click on any button please check if you are using wayland.
echo $XDG_SESSION_TYPEIf this command outputs "wayland" please change to xserver in the login screen of your OS.
macOS 12 Monterey and newer
Due to new technical limitations, Pupil Capture and Pupil Service need to be started with administrator privileges to get access to the video camera feeds. To do that, copy the applications into your /Applications folder and run the corresponding command from the terminal:
Pupil Capture:
sudo /Applications/Pupil\ Capture.app/Contents/MacOS/pupil_capturePupil Service:
sudo /Applications/Pupil\ Service.app/Contents/MacOS/pupil_serviceNote: The terminal will prompt you for your administrator password. It will not preview any typed keys. Simply hit enter once the password has been typed.
Note: When recording with administrator privileges, the resulting folder inherits admin file permissions. Pupil Player will detect these and ask you for the administrator password to reset the file permissions. This will be only necessary once per recording.
Pupil Detection
Pupil Core's algorithms automatically detect the participant's pupil. It runs two detection pipelines in parallel, the 2D and the 3D pupil detection.
2D detection uses computer vision technology to detect the pupil location in the camera image.
3D detection uses a 3D model of the eye(s) that updates based on observations of the eye. This enables the system to compensate for movements of the Pupil Core eye tracking headset on the participant's face (also known slippage). To build up an initial model, we recommend to look around your field of view when putting on the headset.
Fine-tuning Pupil Detection
As a first step it is recommended to check the eye camera resolution as some parameters are resolution dependent.
Pupil Detector 2D Settings
Some settings of the 2D pupil detector can be adjusted to improve pupil detection. For a better visualization of these settings, go to the General Settings menu of the eye windows and enable the Algorithm Mode view. The detector settings can be adjusted in the Pupil Detector 2D plugin.
Pupil Min/Max: InAlgorithm Modethe two red circles represent the min and max pupil size settings. The green circle visualizes the current apparent pupil size. Set the min and max values so the green circle (current pupil size) is within the min/max range for all eye movements.Intensity Range: Defines the minimum "darkness" of a pixel to be considered as the pupil. The pixels considered for pupil detection are visualized in blue when inAlgorithm Mode. Try to minimize the range so that the pupil is always fully covered while having as little leakage as possible outside of the pupil. Be aware that this is dependent on the brightness and therefore has a strong interaction withVideo Source/Sensor Settings/Absolute Exposure Time.
TIP
Keep in mind that pupil size values are defined in pixels and are therefore dependent on the resolution settings of your sensor.
Calibration
Calibration Process
Pupil Core headsets have two types of cameras attached. One camera records the subject's field of vision - we call this the world camera. Additionally there are one or more cameras recording the participant's eye movements - we call these the eye cameras. The data collected during the calibration period is used afterwards to correlate the world camera with the eye cameras.
Pupil Core headsets come in a variety of configurations. Calibration can be conducted with a monocular or binocular eye camera setup.>
Monocular
Binocular
Before Every Calibration
Before starting a calibration, ensure that the participant's pupil is robustly detected and tracked, and that the headset is comfortable for the participant. Make sure that the world camera is in focus for the distance at which you want to calibrate, and that you can see the entire area you want to calibrate within the world camera's field of view (FOV).
Your Pupil is properly detected by the camera.
Make sure the world camera is in focus.
Choreographies
All calibrations require a participant to look at a specific point in the real world or on screen. The way in which markers are presented is called a Choreography. Pupil Core provides different choreographies for common use cases.
Screen Marker Calibration Choreography
This is the default choreography, and a quick way to get started.
- Select the
Screen Markerchoreography - Select your
Monitor(if more than 1 monitor) - Press
con your keyboard or click the blue circularCbutton in the left hand side of the world window to start calibration. - Follow the marker on the screen with your eyes. Try to keep your head still during calibration.
- The calibration window will close when calibration is complete.
If your participants have trouble following the markers, you can adjust the Marker size or Sample duration parameters. We recommend to enable Use fullscreen for best marker visibility.
Calibration Marker
If you're not going to do calibration on screen with the Screen Marker choreography, you will need to download the Pupil's Circular Calibration Marker. This marker can be automatically detected by Pupil software in the world video.
In most use cases you will only need to use the Pupil Calibration Marker. The Stop Marker is used if you want to be able to conclude a calibration sequence by showing this marker.
TIP
Make sure to always use the v0.4 marker design for best detection performance!
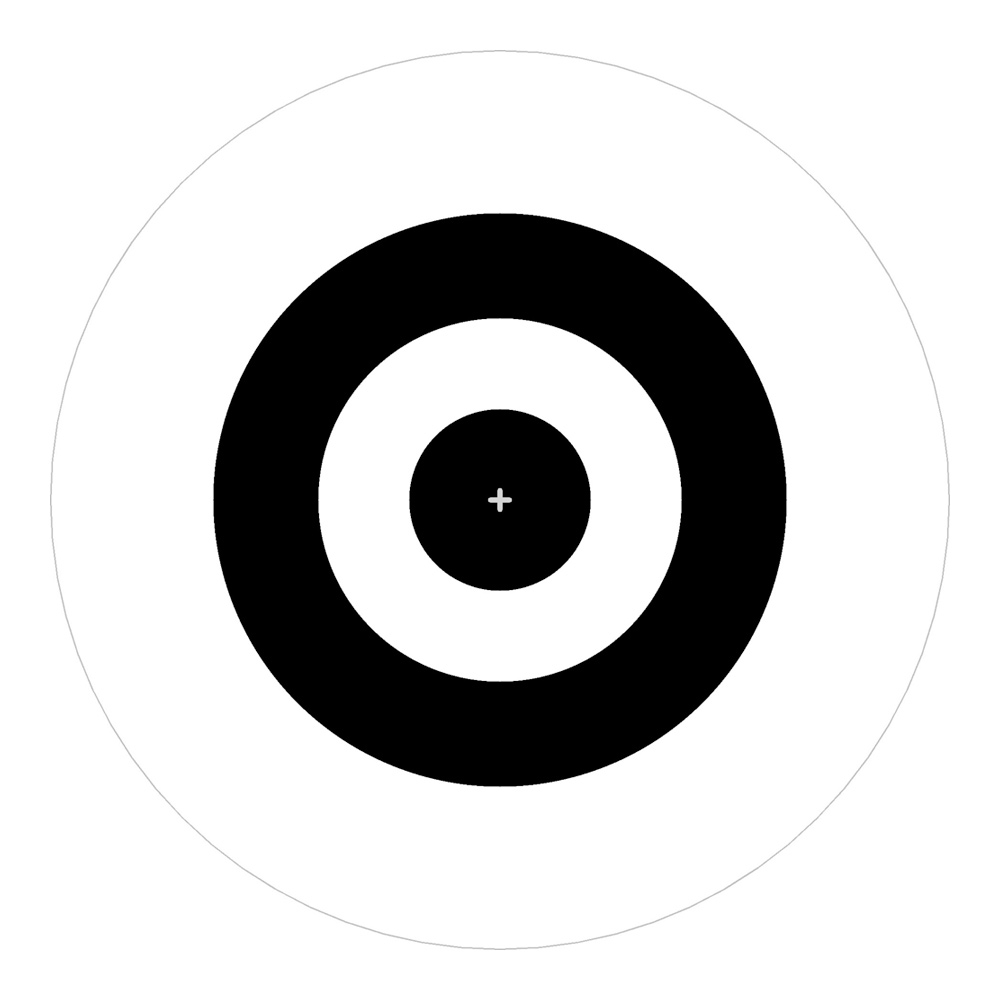
Pupil Calibration Marker v0.4

Pupil Calibration Stop Marker v0.4
Download Pupil Labs Calibration Marker v0.4 to print or display on smartphone/tablet screen.
Single Marker Calibration Choreography
Calibrate using a single marker, either with a printed (physical) markers or a digital marker displayed on screen. Gaze at the center of the marker and move your head in a spiral motion. You can also move your head in other patterns. This choreography enables you to quickly sample a wide range of gaze angles and cover a large range of your FOV.
- Select
Single Markerchoreography - Press
con your keyboard or click the blue circularCbutton on the left hand side of the world window to start calibration. - Look at the center of the marker.
- Slowly move your head while gazing at the center of the marker. We have found that a spiral pattern is an efficient way to cover a large area of the FOV.
- Press the
Cbutton on your keyboard or show the stop marker to stop calibrating.
TIP
This paper introduces and evaluates this type of single marker calibration - CalibMe: Fast and Unsupervised Eye Tracker Calibration for Gaze-Based Pervasive Human-Computer Interaction
Natural Features Calibration Choreography
This choregraphy is used only in special situations.
- Select
Natural Features Calibration - Press
con your keyboard or click the blue circularCbutton in the left hand side of the world window to start calibration. - Ask the subject (the person wearing the Pupil headset) to look a point within their field of vision. Note: pick a salient feature in the environment.
- Click on that point in the world window.
- Data will be sampled.
- Repeat until you have covered the subject's field of view (generally about 9 points should suffice)
- Press
con your keyboard or click the blue circularCbutton in the left hand side of the world window to stop calibration.
Gaze Mapping and Accuracy
With the 2D Gaze Mapping, you should easily be able to achieve tracking accuracy within the physiological limits (sub 1 deg visual degrees). Using the 3D Gaze Mapping you should achieve 1.5-2.5 deg of accuracy.
- Any monocular calibration is accurate only at its depth level relative to the eye (parallax error).
- Any calibration is only accurate inside the field of view (in the world video) you have calibrated. For example: If during your calibration you only looked at markers or natural features (depending on your calibration choreography) that are in the left half, you will not have good accuracy in the right half.
- Calibration accuracy can be visualized with the
Accuracy Visualizerplugin. If theAccuracy Visualizerplugin is loaded, it will display the residual between reference points and matching gaze positions that were recorded during calibration. - Gaze Prediction Accuracy can be estimated with an accuracy test. Start the accuracy by running a normal calibration procedure but press the
Tbutton in the world window and not theCbutton. After completing the test, the plugin will display the error between reference points and matching gaze positions that were recorded during the accuracy test.
Accuracy is calculated as the average angular offset (distance) (in degrees of visual angle) between fixation locations and the corresponding locations of the fixation targets.
Precision is calculated as the Root Mean Square (RMS) of the angular distance (in degrees of visual angle) between successive samples during a fixation.
Recording
Press r on your keyboard or press the circular R button on the left hand side of the world window to start recording. You will see red text with the elapsed time of recording next to the R button. To stop recording, press r on your keyboard or press the R button on screen.
You can change recording settings in the Recorder plugin menu. Set the folder where recordings are saved under Path to recordings. Set the recording name in Recording session name.
TIP
Note - you must specify an existing folder, otherwise the Path to recordings will revert to the default path.
Recording files
If you open up a recording session folder you will see a collection of video(s) and data files. Take a look at Recording format/ for an overview.
Plugins
Open the Plugin Manager menu on the right.
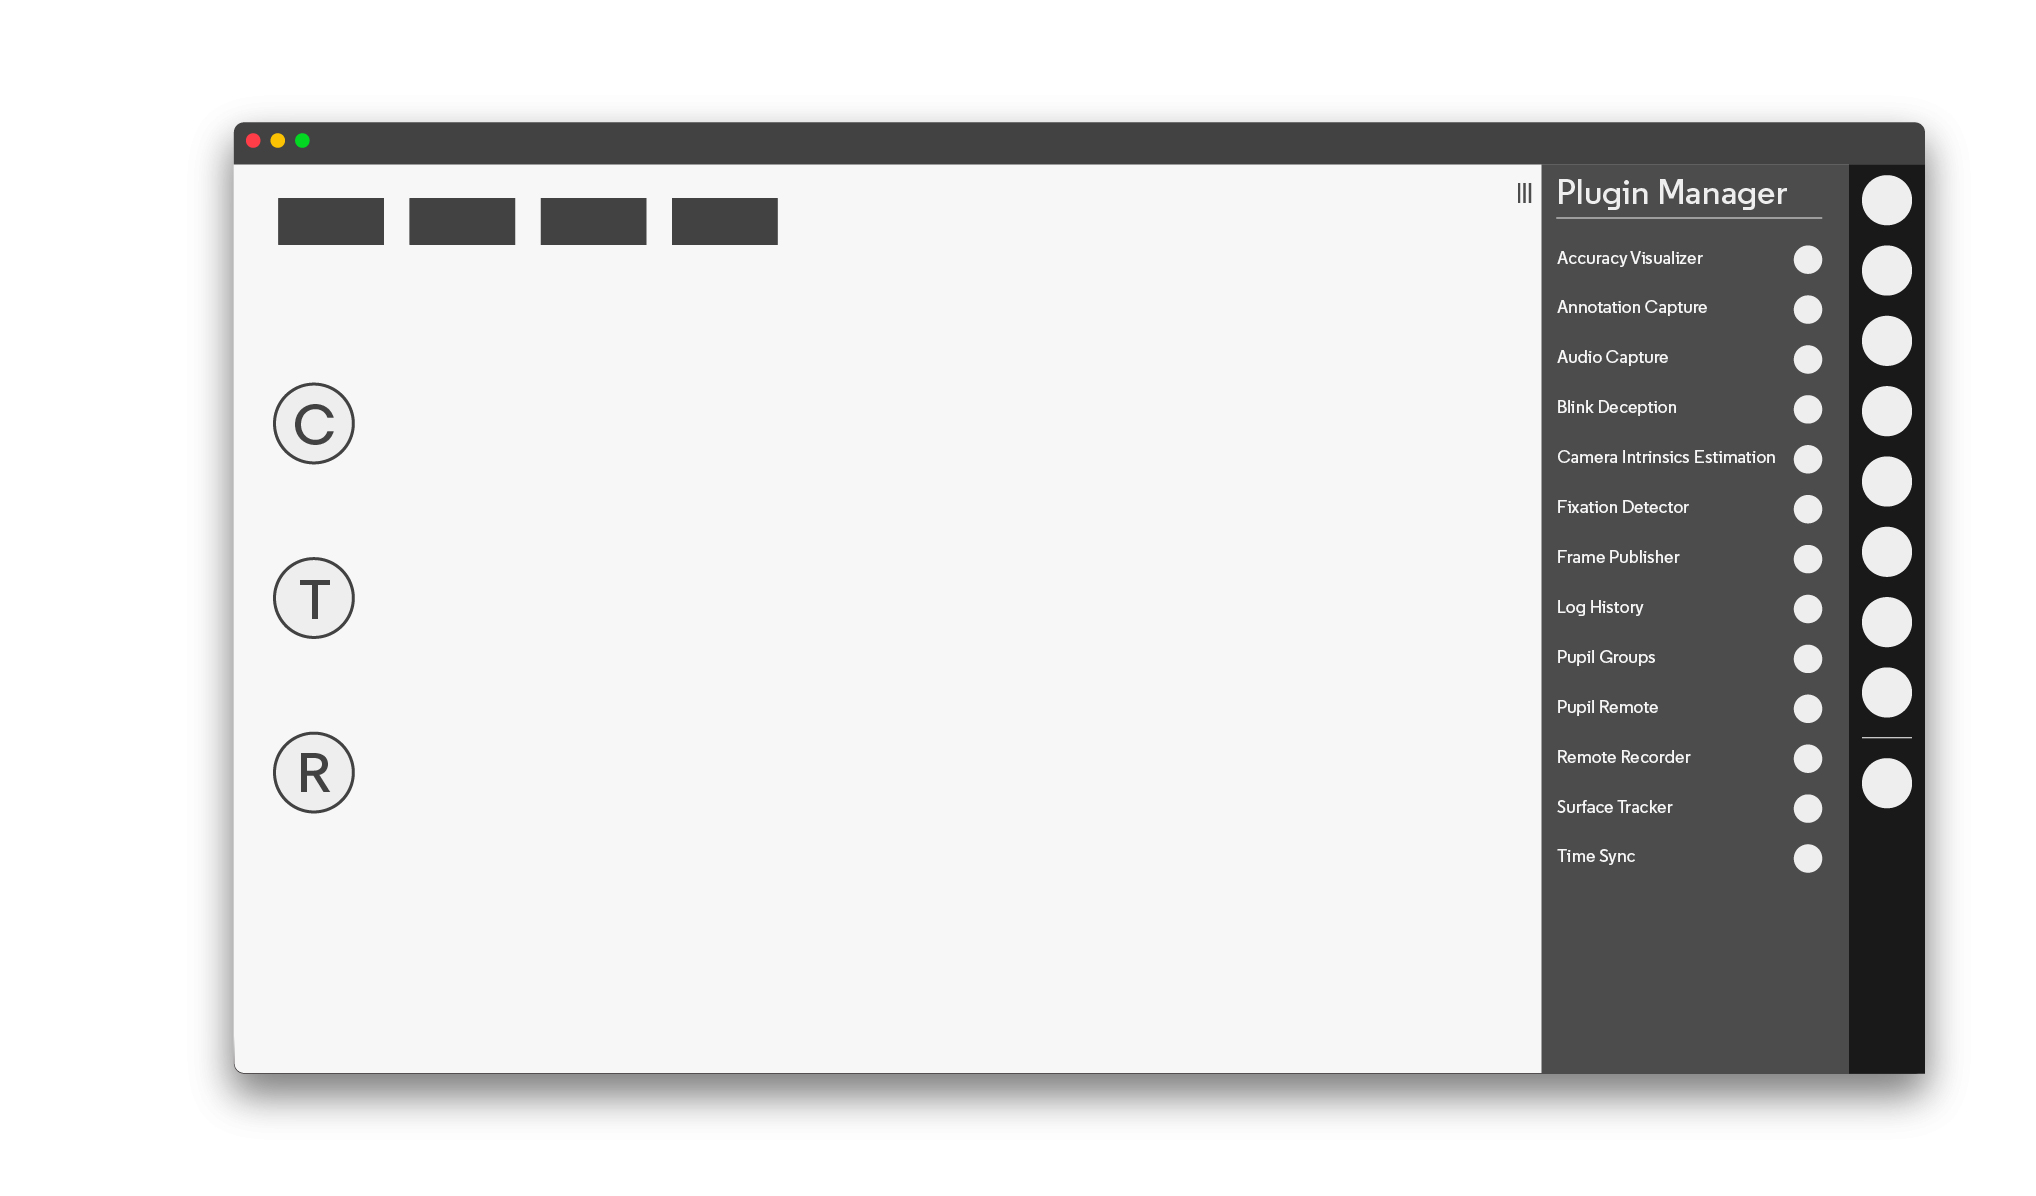
It lists all available plugins. Click the button next to the plugin's name to turn on or off the plugin.
Third-party plugins
You can easily load third party plugins. Third party plugins will appear in the Pupil Capture or Pupil Player plugin list. Copy the plugin to the plugins folder within the pupil_capture_settings or pupil_player_settings folder.
Fixation Detector
The online fixation detector classifies fixations based on the dispersion-duration principle. A fixation is visualized as a yellow circle around the gaze point that is shown in the Pupil Capture world window.
You can find more information in our dedicated fixation detection section.
Network plugins
Pupil Capture has a built-in data broadcast functionality. It is based on the network library ZeroMQ and follows the PUB-SUB pattern. Data is published with an affiliated topic. Clients need to subscribe to their topic of interest to receive the respective data. To reduce network traffic, only data with at least one subscription is transferred.
Network API plugin
The Network API plugin provides a high level interface to control Pupil Capture over the network (e.g. start/stop a recording). It also functions as the entry point to the broadcast infrastructure.
The section Pupil Remote allows you to specify the network interface. By default, Pupil will listen on the primary network interface. You can specify a custom port, or even choose a different interface.
TIP
See the developer documentation on how to access Pupil Remote from your own application.
The Network API plugin also broadcasts video frames from the world and eye cameras. You can change the image format in the Frame Publisher section.
For a demonstration of how to receive and decode world frames, please take a look at the recv_world_video_frames helper scripts in the pupil-helpers repository.
Pupil Groups
Pupil Groups can help you to collect data from different devices and control an experiment with multiple actors (data generators and sensors) or use more than one Pupil device simultaneously:
- Load the
Pupil Groupsplugin from theGeneralsub-menu in the GUI. - Once the plugin is active it will show all other local network Pupil Group nodes in the GUI
- Furthermore, actions like starting and stopping a recording on one device will be mirrored instantly on all other devices.
TIP
For this to work your network needs to allow UDP transport. If the nodes do not find each other, create a local wifi network and use that instead.
TIP
Pupil Groups can easily be integrated in your own app or device. Take a look at the developer docs to get started.
Pupil Time Sync
If you want to record data from multiple sensors (e.g. multiple Pupil Capture instances) with different sampling rates it is important to synchronize the clock of each sensor. You will not be able to reliably correlate the data without the synchronization.
The Pupil Time Sync protocol defines how multiple nodes can find a common clock master and synchronize their time with it.
The Pupil Time Sync plugin is able to act as clock master as well as clock follower. This means that each Pupil Capture instance can act as a clock reference for others as well as changing its own clock such that it is synchronized with another reference clock.
Pupil Time Sync nodes only synchronize time within their respective group. Be aware that each node has to implement the same protocol version to be able to talk to each other.
TIP
See the pupil-helpers for example Python implementations.
TIP
For this to work your network needs to allow UDP transport. If the nodes do not find each other, create a local wifi network and use that instead.
Remote Recorder
WARNING
Depreciation warning: Pupil Mobile app is no longer maintained.
The Pupil Mobile app can be controlled via Pupil Capture when connected. This includes changing camera and streaming settings. The Remote Recorder plugin extends this list with the possibility to start and stop recording on the Android device.
Surface Tracking
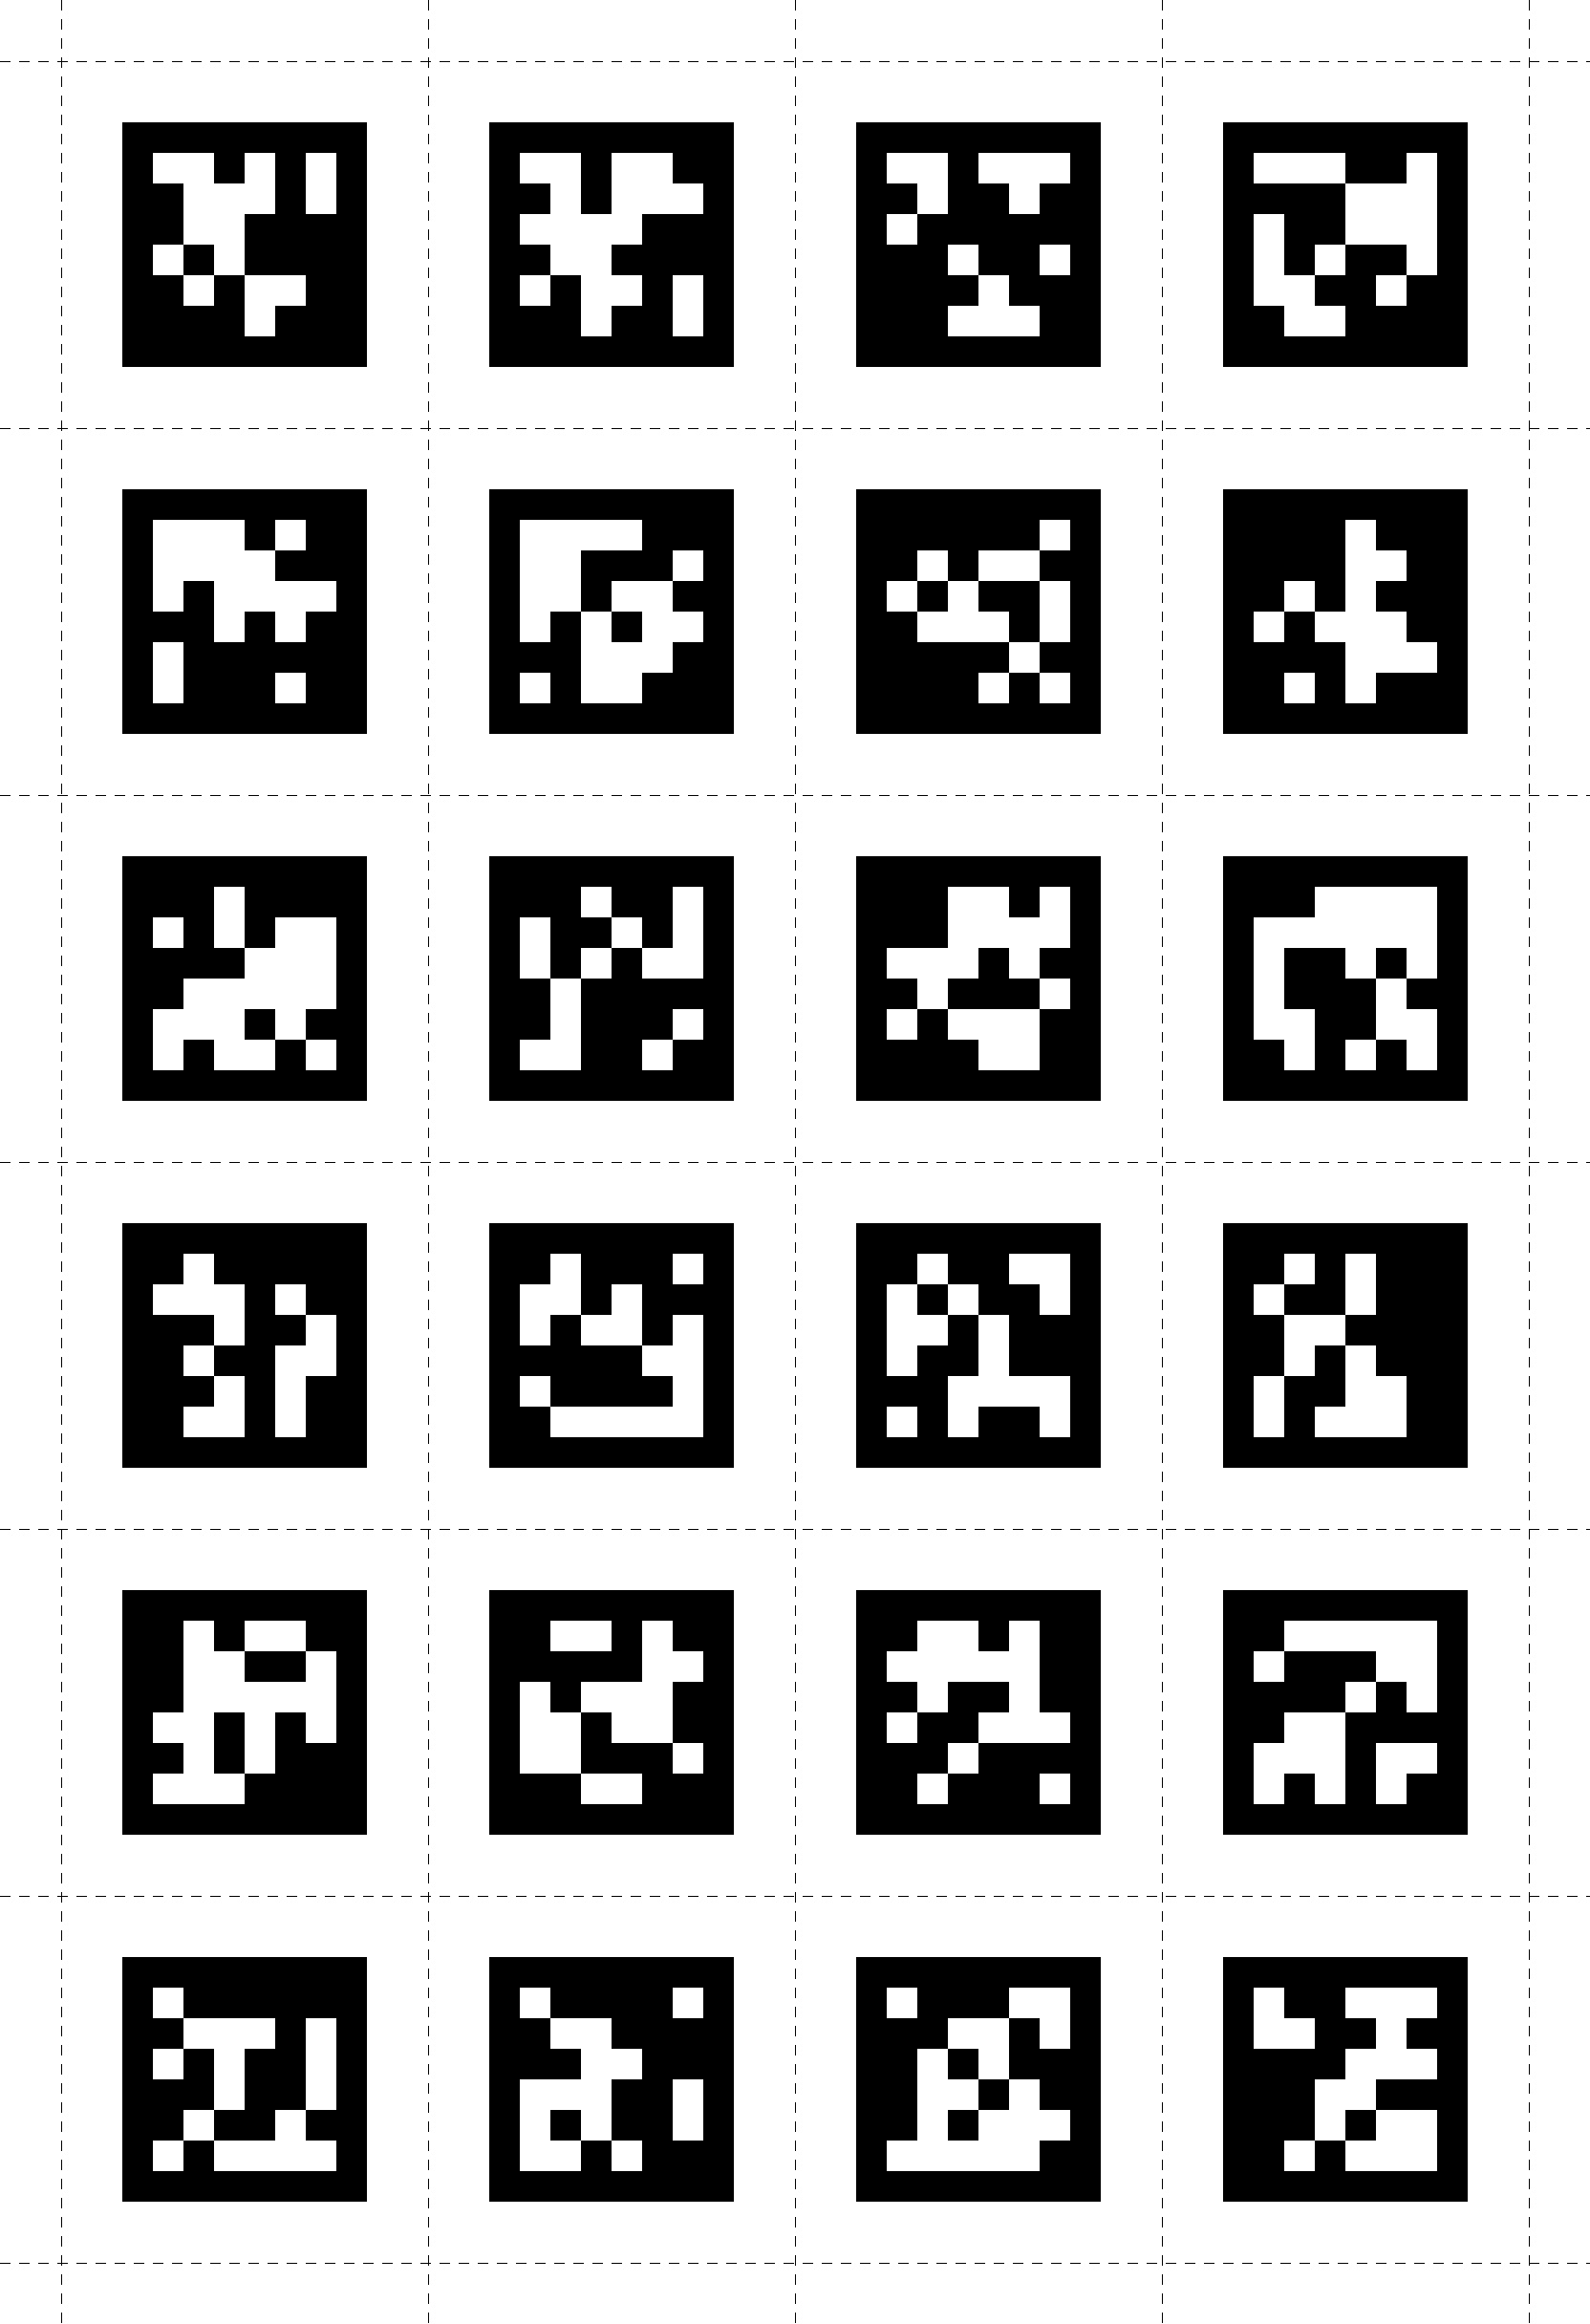
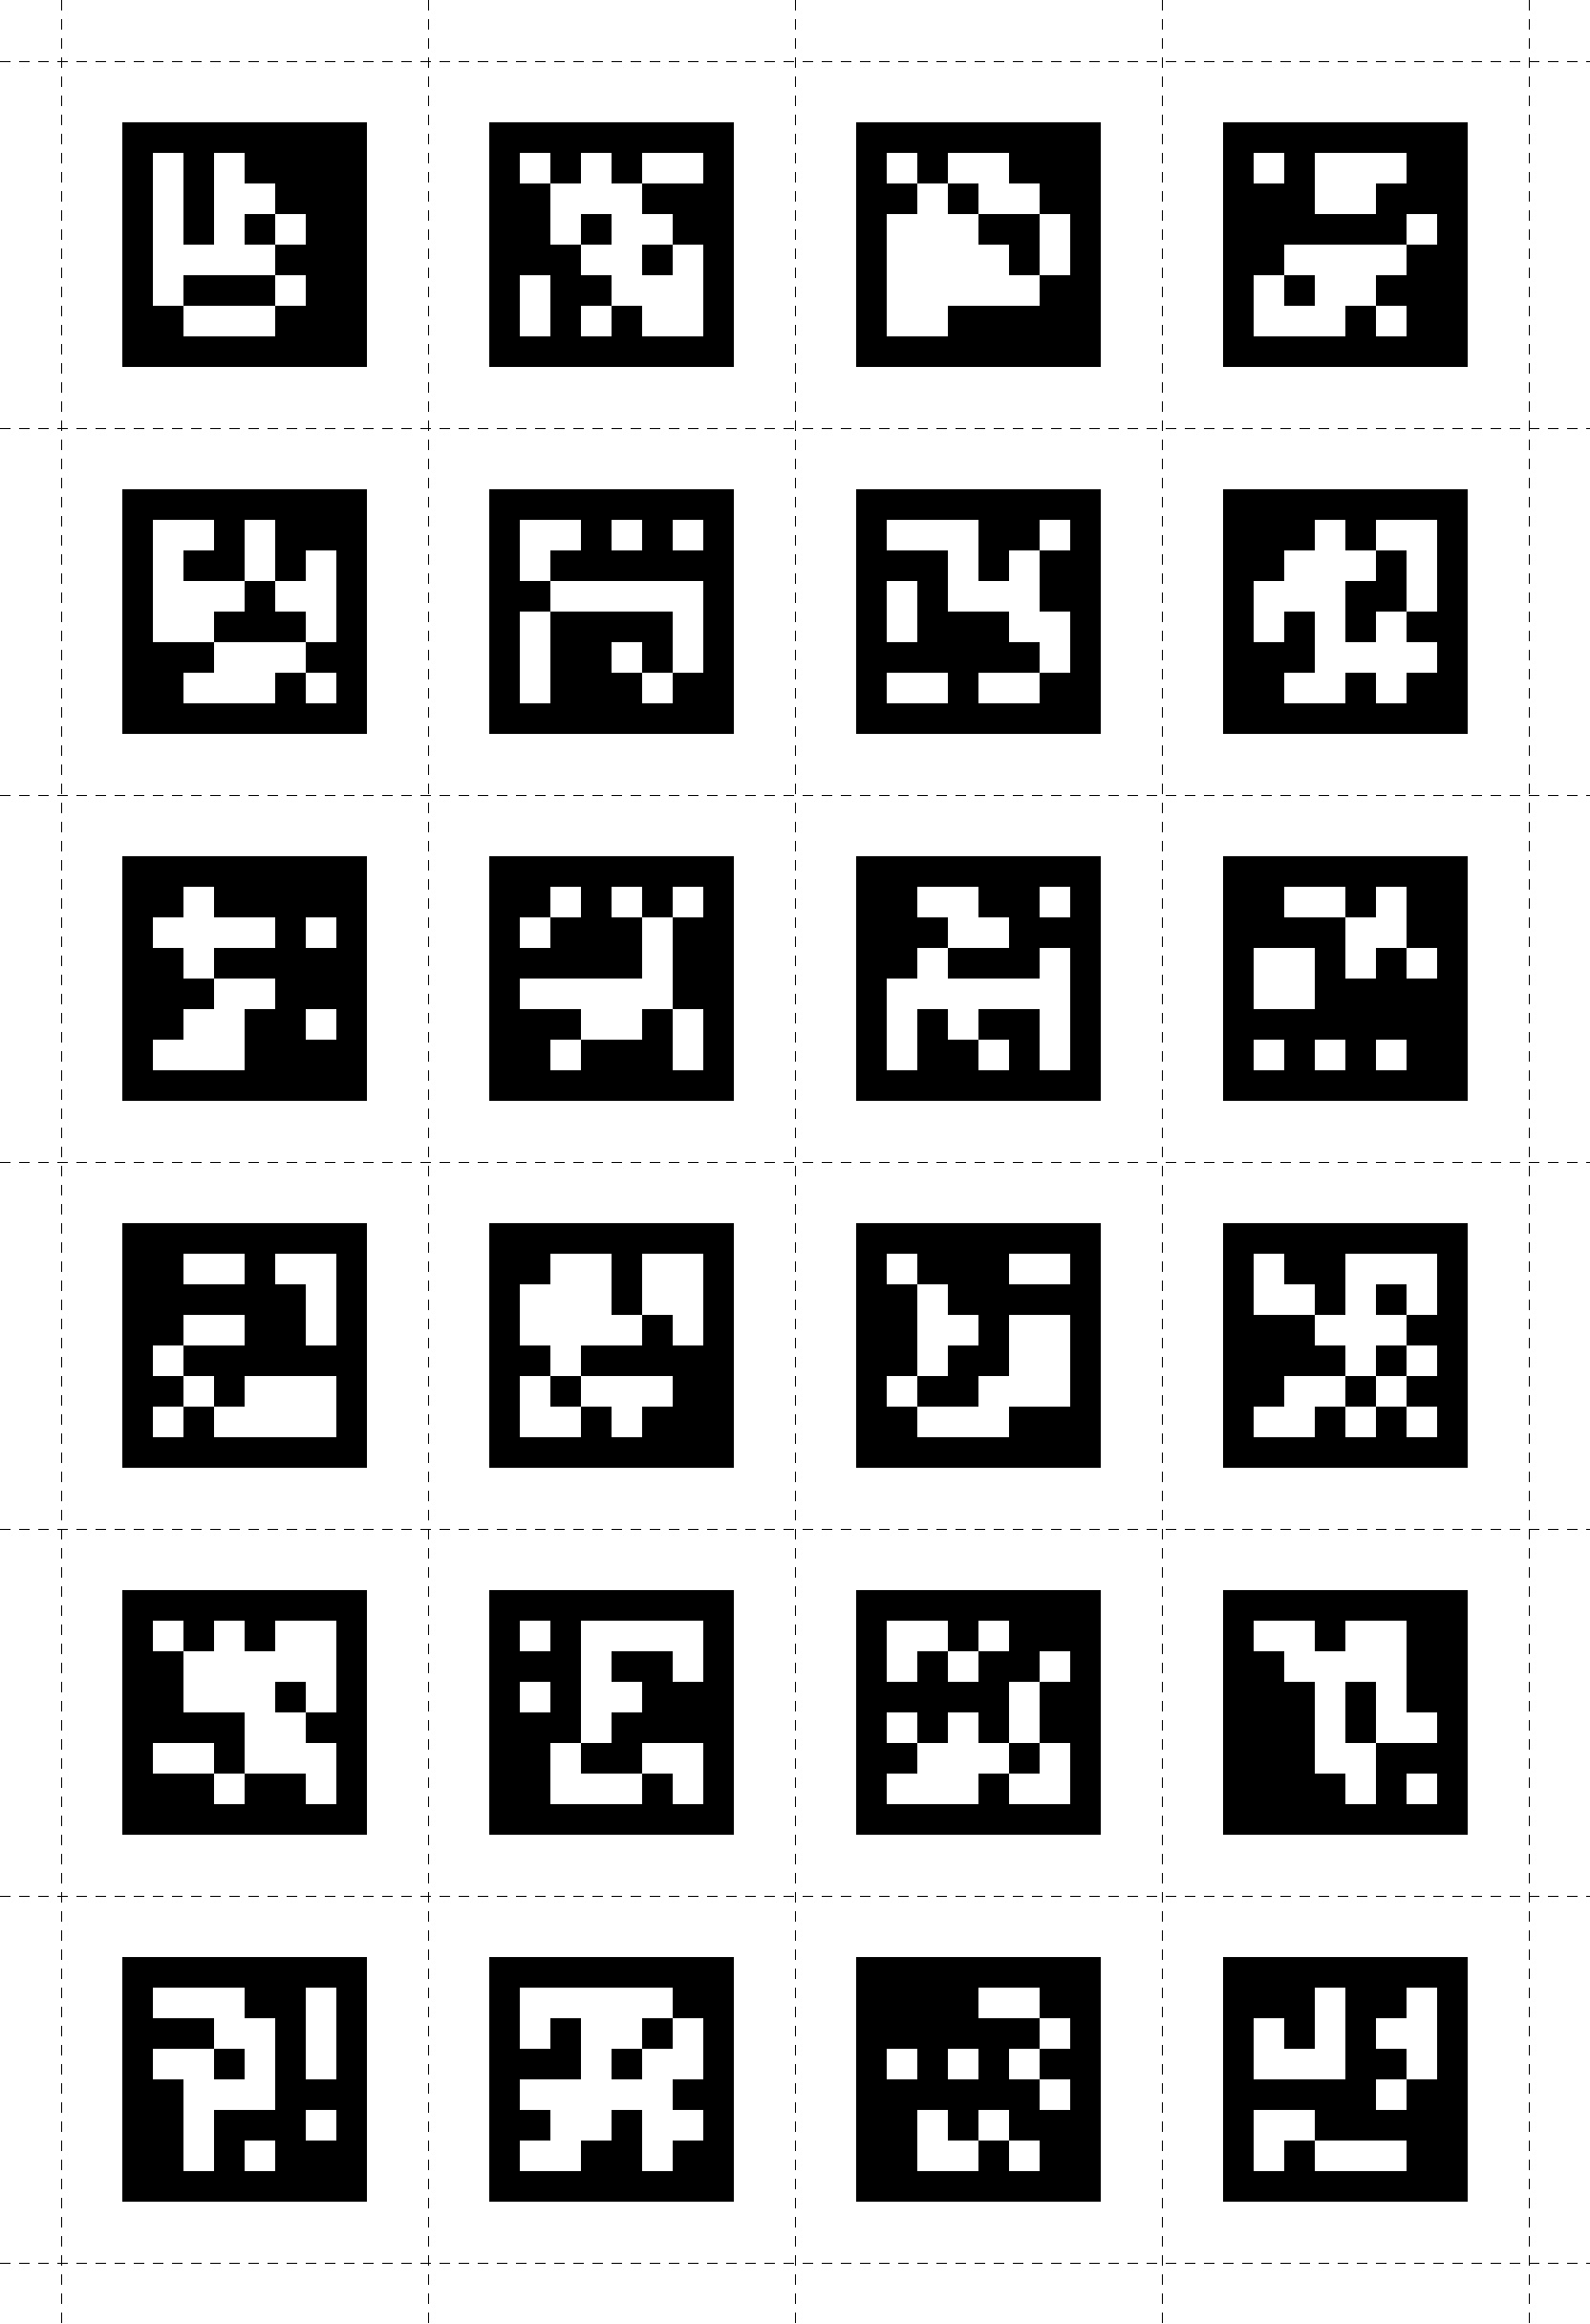
The Surface Tracker plugin allows you to define planar surfaces within your environment to track areas of interest (AOI). Surfaces are defined with Apriltag Markers.
TIP
The legacy surface tracker used simple square markers, which are less robust to detect. For all new projects we strongly recommend using Apriltags. You can find more information on the legacy markers below.
Markers
There are many different Apriltag types, currently we support 7 families listed below. You can click on the links to download the individual markers from the AprilTags repository. For your convenience we have also prepared some tags from the tag36h11 family in the two images below.
Additionally, we created a PDF with one page per tag for all 587 tags from the tag36h11 family here: tag36h11_full.pdf. You can use this to print custom marker sheets by printing multiple pages per sheet.
WARNING
Note that the markers require a white border around them for robust detection. In our experience, this should be at least equal to the width of the smallest white square/rectangle shown in the Marker. Please ensure you include a sufficient border around when displaying markers on screen or printing the markers.
If you want to generate your own marker sheets or similar PDFs of other families, you can find more information in the the pupil-helpers repository.
Supported Apriltag families:
Apriltags ready to use:
Markers can be printed on paper, stickers, or displayed on a screen.
Preparing your Environment
A surface can be based on one or more markers. The markers need to be placed in close proximity or within your desired AOI. If your AOI is for example a computer monitor, you could display your markers in the corners of the screen or place them somewhere on the bezel. If your AOI is a magazine page, you could place the markers in the corners of the page, or anywhere else on the page where they are not occluding the content. When placing your markers please follow the guidelines:
- All markers of a surface need to lie within the same two dimensional plane.
- An individual marker can be part of multiple surfaces.
- The used markers need to be unique, i.e. you may not use multiple instances of the same marker in your environment.
- Using more markers to define a surface yields greater robustness in the tracking of that surface.
- Surfaces defined with more than 2 markers are detected even if some markers lie outside of the camera image or are obscured.
Defining a Surface
Surfaces can be defined with Pupil Capture in real-time, or post-hoc with Pupil Player. In both cases the necessary steps are as follows:
- Prepare your environment as described above.
- Turn on the
Surface Trackerplugin . - Make sure the camera is pointing at your AOI and the markers are well detected. In the post-hoc case (using Pupil Player) seek to a frame that contains a good view of your desired AOI.
- Add a new surface by clicking the
Add surfacebutton. - Give your surface a name.
- Click the
edit surfacebutton and move the corners of your surface into the desired position. In the real-time case (using Pupil Capture) this is much easier if you freeze the video by clicking theFreeze Scenebutton. - If markers have been erroneously added or left out, click the
add/remove markersbutton and afterwards onto the according marker to add/remove them from your surface.
Reusing Surface Definitions
Your surfaces are automatically saved in a file called surface_definitions in the pupil_capture_settings directory.
If you restart Pupil Capture or the Surface Tracker plugin, your surface definitions from previous sessions will be loaded.
The surface_definitions file is copied into each recording folder as well, so you will have access to your surface definitions in Pupil Player. You can copy & paste this file to move definitions from one session or recording to another.
Gaze Heatmaps for Surfaces
You can display gaze heatmaps for each surface by enabling Show Heatmap in the Surface Tracker menu. Two heatmap modes are supported:
Gaze within each surface: Visualizes the distribution of gaze points that lie within each surface.Gaze across different surfaces: Color codes the surfaces to visualize the amount of time spend gazing on each surface in relation to other surfaces. Red color represents a lot of gaze points or time spent. Blue color represents few gaze points or little time spent.
The smoothness of the heatmap in Gaze within each surface mode can be set using the Heatmap Smoothness slider, which will effectively change the bin size of the underlying histogram. In the online case the heatmap is computed over the most recent data. The exact time window to consider can be set using the Gaze History Length field.
Performance Settings
The detector for Apriltag Markers offers two parameters Use high resolution and Sharpen image that are turned on by default. If you are experiencing high CPU load you can try turning off those settings. This will result in less CPU load but also decreases the detection rate.
Further Functionality
- You can click the
Open Surface in Windowbutton to open a view of the surface in a separate window. Gaze positions on the surface will be visualized in this window in real-time. - Streaming Surfaces with Pupil Capture - Detected surfaces as well as gaze positions relative to the surface are broadcast under the
surfacetopic. Check out this video for a demonstration. - Surface Metrics with Pupil Player - if you have defined surfaces, you can generate surface visibility reports or gaze count per surface.
Legacy Markers
The legacy surface system used simple square markers, which are less robust to detect. For all new projects we strongly recommend using Apriltags!
Blink Detector
The online blink detector classifies blinks according to onset and offset thresholds associated with 2D pupil confidence. See the Blink Detector documentation for more information.
Read more about accessing blink detection results in real-time in the developer documentation.
Annotations
The Annotation Capture plugin allows you to mark timestamps with a label -- sometimes referred to as triggers. These labels can be created by pressing their respective hotkey or by sending a message with the topic annotation. This is useful to mark external events (e.g. "start of condition A") within the Pupil recording. The Annotation Player plugin is able to correlate and export these events as well as add new ones.
You can also create remote annotation events programmatically and send them to Pupil Capture via the Pupil Core Network API.
Camera Intrinsics Estimation
This plugin is used to calculate camera intrinsics, which will enable one to correct camera distortion. Pupil Capture has built in, default camera intrinsics models for the high speed world camera and the high resolution world camera. You can re-calibrate your camera and/or calibrate a camera that is not supplied by Pupil Labs by running this calibration routine. We support two different distortion models, radial distortion and fisheye distortion. For cameras with a FOV of 100 degrees or greater (like e.g. the high speed world camera) the fisheye distortion model usually performs better, for cameras with a smaller FOV (e.g. the high resolution world camera) we recommend the radial distortion model.
- Select
Camera Intrinsics Estimation - Click on 'show pattern' to display the pattern
- Resize the pattern to fill the screen
- Hold your Pupil headset and aim it at the pattern.
- With the world window in focus, press
ion your keyboard or the circularIbutton in the world windows to detect and capture a pattern. - Data will be sampled and displayed on the screen as a border of the calibrated pattern. (Note - make sure to move your headset at different angles and try to cover the entire FOV of the world camera for best possible calibration results)
- Repeat until you have captured 10 patterns.
- Click on
show undistorted imageto display the results of camera intrinsic estimation. This will display an undistorted view of your scene. If well calibrated, parallel lines in the real world will appear as parallel lines in the undistorted view.
Note that in some rare cases the processing of the recorded patterns can fail, which would lead to a warning message in the world window. In this case just repeat the above process from step 6 and try to get a better coverage of the entire FOV of the camera.
TIP
If you are having trouble estimating camera intrinsics, Chat with us.
Camera Intrinsics Persistency
Newly estimated camera intrinsics are saved to the Pupil Capture session settings folder:
- From bundle:
Home directory -> pupil_capture_settings - From source:
repository directory -> capture_settingsSpecifically, the intrinsics are saved to a file with the name pattern<camera name>.intrinsicswhich includes the relevant intrinsics for each calibrated resolution. See the developer docs on how to read these files manually.
Pupil Capture provides prerecorded intrinsics for the following cameras:
| Camera name | Resolutions | Notes |
|---|---|---|
| Pupil Cam1 ID2 | 640x4801280x7201920x1080 | Pupil Core high-speed scene camera |
| Pupil Cam2 ID0/1 | 192x192400x400 | Core headset eye camera; max. 200 Hz sampling rate |
| Pupil Cam3 ID0/1 | 192x192400x400 | HTC Vive add-on eye camera; max. 200 Hz sampling rate |
| Logitech Webcam C930e | 640x4801280x7201920x1080 | Pupil Core high-definition scene camera (discontinued) |
| Pupil Cam1 ID0/1 | 320x240640x480 | eye camera (discontinued); max. 120 Hz sampling rate |
When a recording is started in Pupil Capture, the application saves the active camera intrinsics to the world.intrinsics, eye0.intrinsics, and eye1.intrinsics files within the recording.
Camera Intrinsics Selection
Pupil Capture selects the active camera intrinsics following these priorities:
- Active camera name and resolution match a custom intrinsics estimation.
- Active camera name and resolution match a prerecorded intrinsics estimation.
- Fallback to a "dummy calibration" (pinhole camera model without distortion, focal length 1000px).
Pupil Player follows the same priorities as Pupil Capture but expects the custom intrinsics to be present within the recording under the <video file name>.intrinsics file name pattern, e.g. world.intrinsics.
Camera field of view (FOV)
Based on the estimated intrinsics, one can calculate the camera's field of view (FOV).
Field of view in degrees:
| Camera name | Resolution | Horizontal | Vertical | Diagonal |
|---|---|---|---|---|
| Pupil Cam1 ID2 (default – wide-angle lens) | 1920x1080 | 155° | 85° | --- |
1280x720 | 103° | 54° | 122° | |
640x480 | 103° | 73° | 134° | |
| Pupil Cam1 ID2 (narrow-angle lens) | 1920x1080 | 62° | 36° | 69° |
1280x720 | 42° | 24° | 47.5° | |
640x480 | 42° | 32° | 51° | |
| Pupil Cam2 ID0/1 | 400x400 | 39° | 39° | 53° |
192x192 | 37° | 37° | 51° | |
| Pupil Cam3 ID0/1 | 400x400 | 71° | 71° | 91° |
192x192 | 69° | 69° | 88° | |
| Logitech Webcam C930e (discontinued) | 1920x1080 | 82° | 53° | 91° |
1280x720 | 80° | 51° | 89° | |
640x480 | 64° | 52° | 77° | |
| Pupil Cam1 ID0/1 (discontinued) | 640x480 | 51° | 39° | 62° |
320x240 | 51° | 39° | 61° |